Gitpod is a backup editor in case there are issues with Codespaces. Follow the steps here to get set up.
Getting Started With Gitpod
Follow these one-time setup instructions. Complete every step in this section!
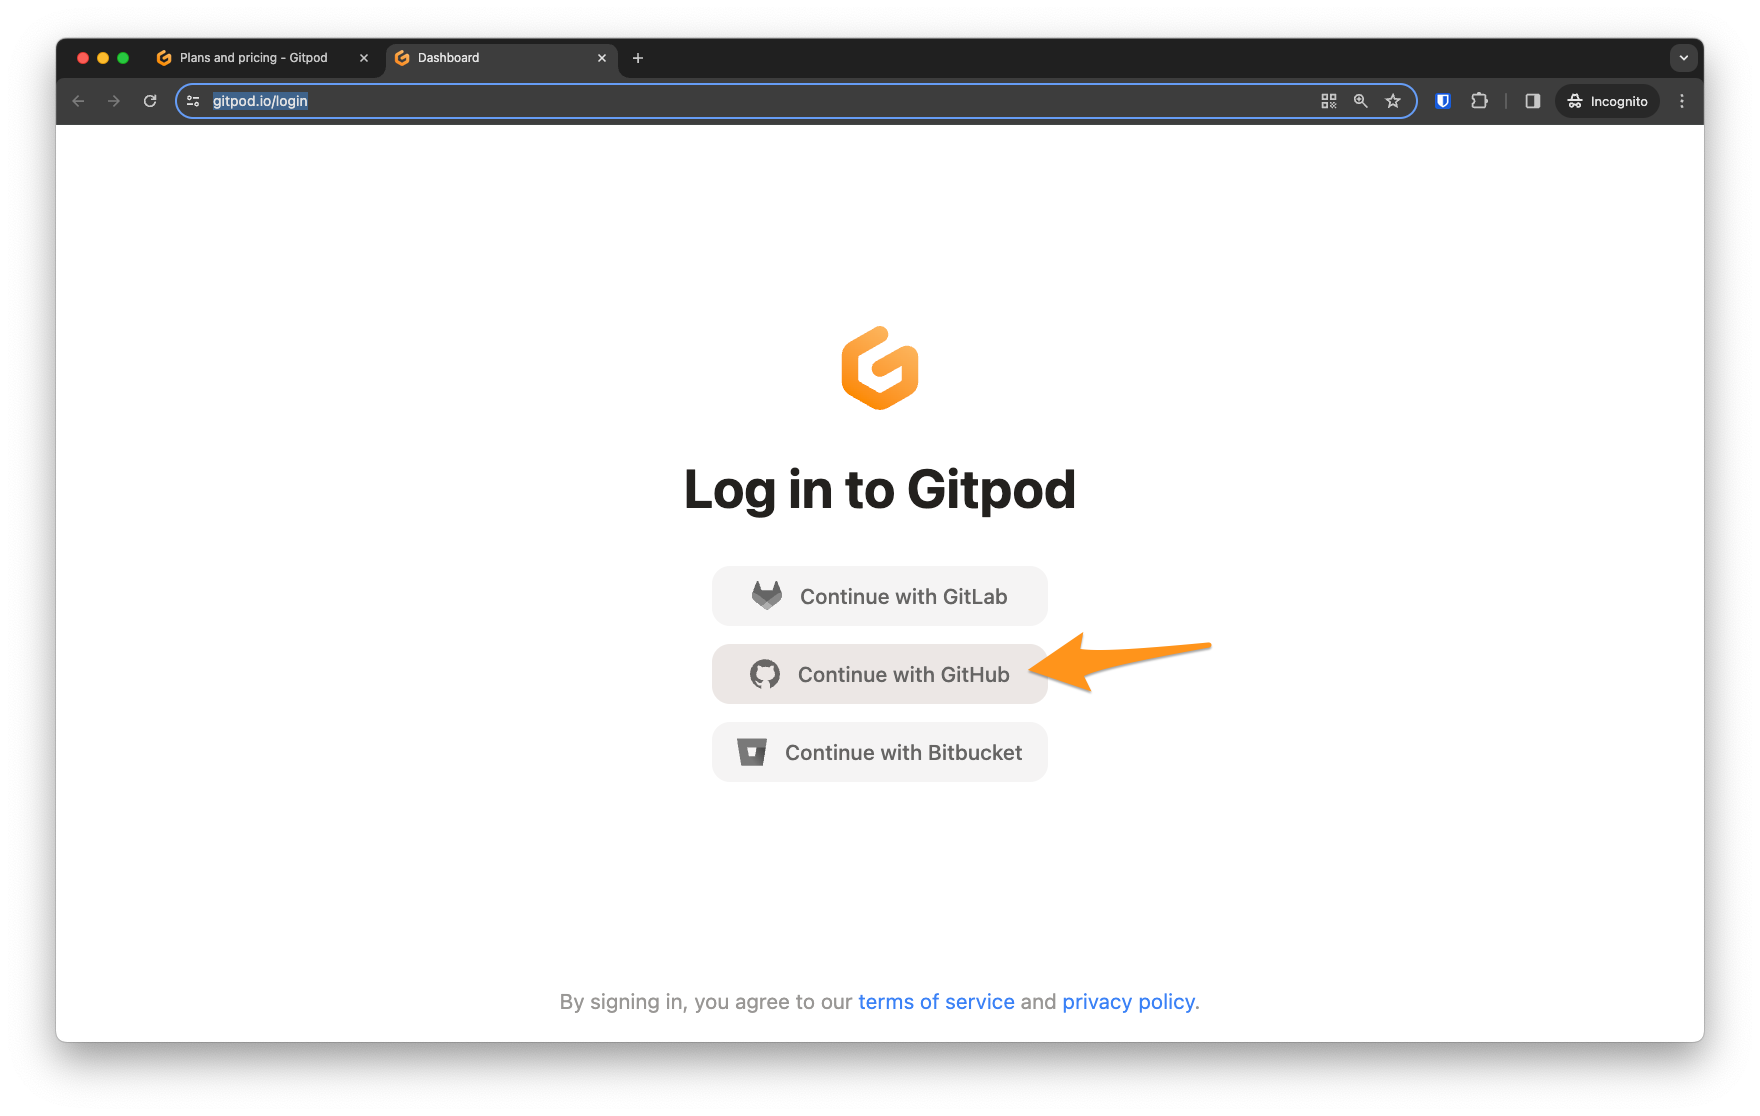
Visit gitpod.io/login and select “Continue with GitHub” to login with your GitHub credentials to create a new Gitpod account.
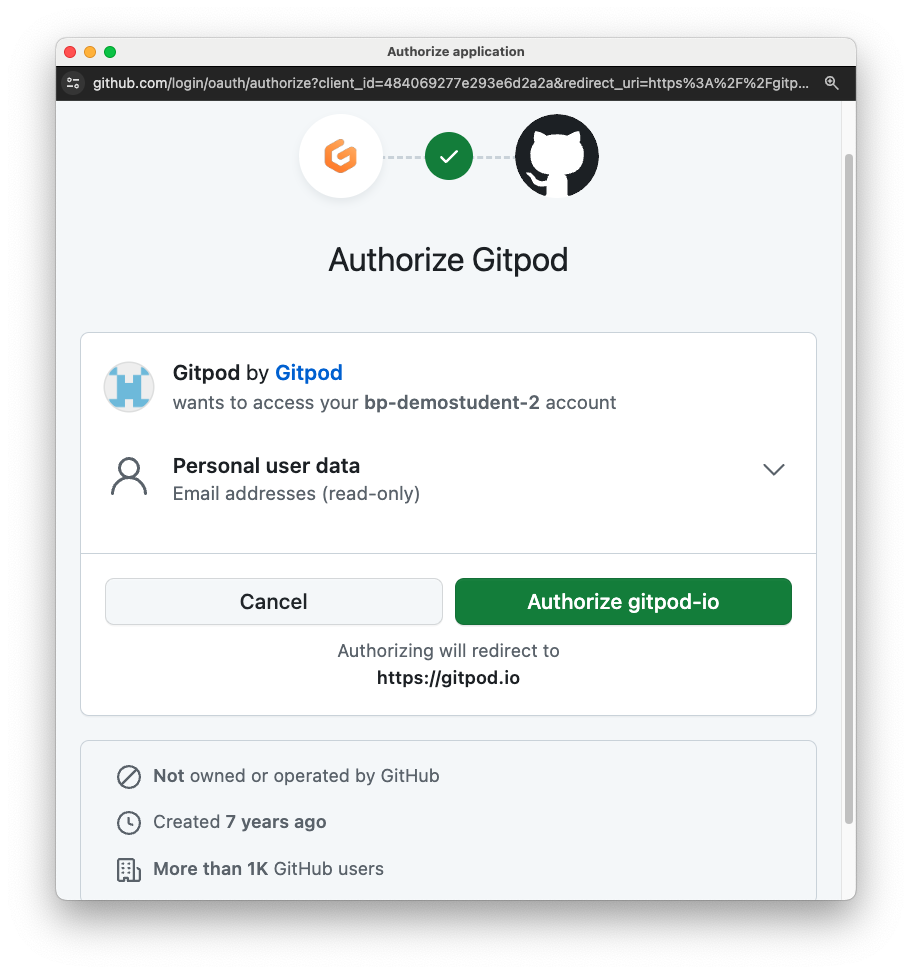
After you login, click the “Authorize gitpod-io” button:
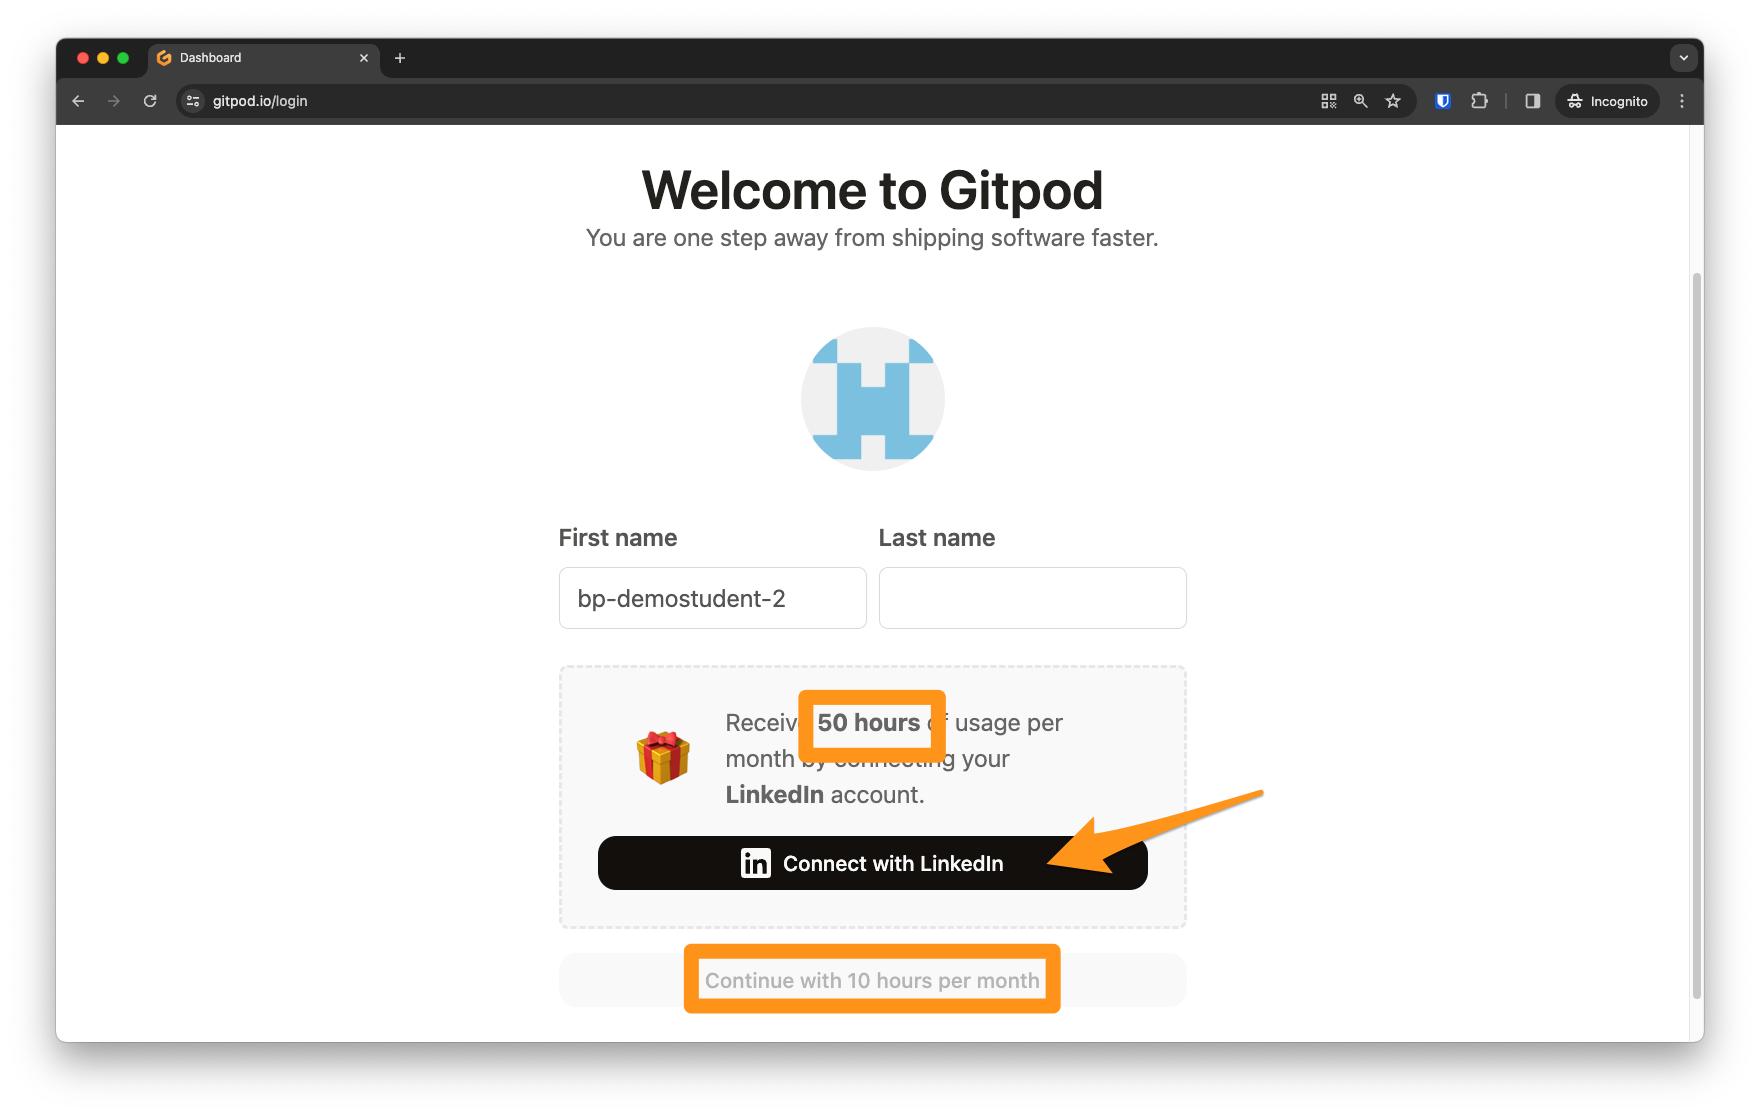
Fill in your first and last name on the next screen. You will also be asked to connect your Linkedin account to receive 50 free hours of usage per month. If you do not connect your Linkedin account, you will only receive 10 hours of free usage per month. This is likely okay if you are only experiencing intermittent codespace problems.
However, if codespace problems persist, 10 hours per month is insufficient for this course, so we strongly recommend connecting your Linkedin account. (If you have one; if not, now is a great time to quickly make one, you can always add to it later.)
Finish setting up your account by answering a few analytics questions from Gitpod, after that you should land on your account’s gitpod.io/workspaces page, where you can manage your active workspaces!
Before we can push our code from our Gitpod workspace to our GitHub account (for eternal safekeeping), we need to give Gitpod permission to manage our repositories and to interact with our profile.
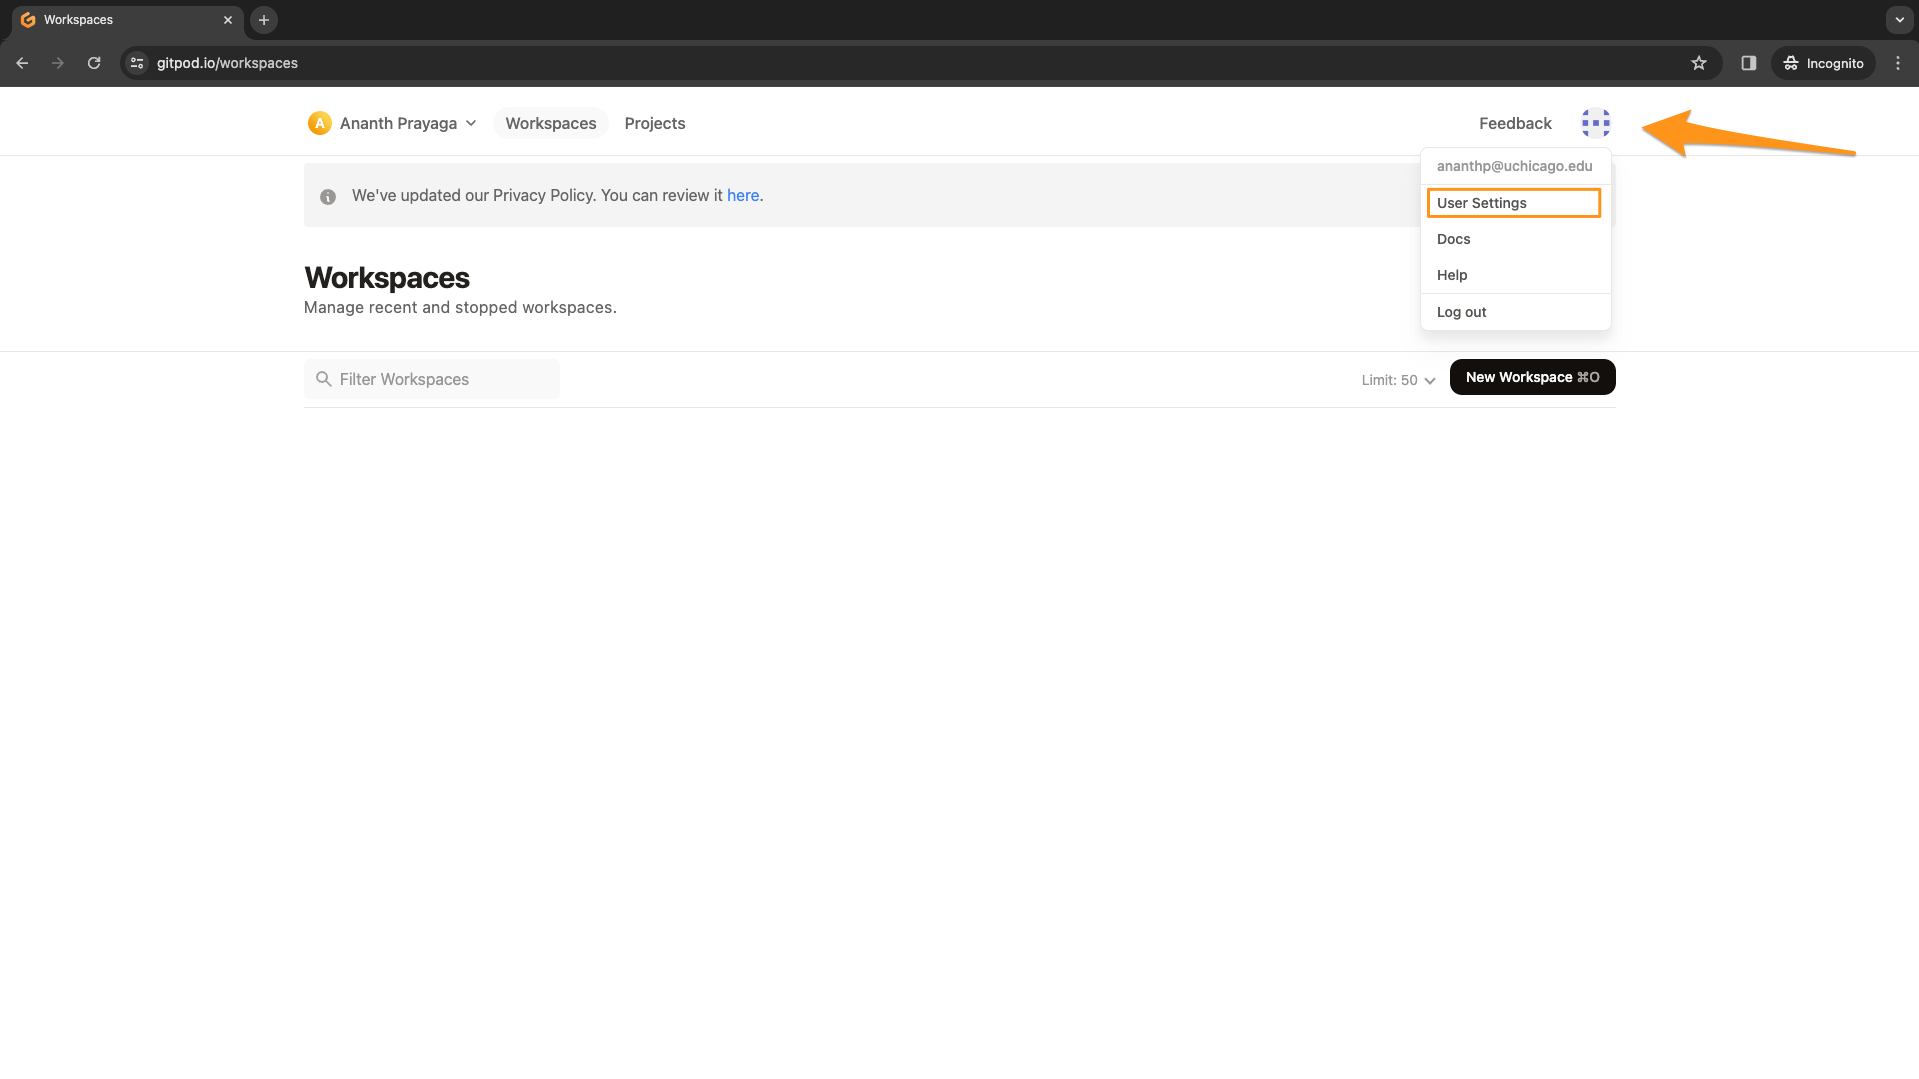
Visit your Gitpod workspaces dashboard, click your icon in the top-right corner, and select “User Settings”:
Click “Git Providers” in the left sidebar, click the “…” next to “GitHub”, and select “Edit Permissions”:

Make sure that user:email, read:user, public_repo, repo and workflow are checked, and then click “Update Permissions”:

Gitpod will delete your workspace after a period of inactivity (14 days). You will lose all of your work if you do not make git commits and push the code to GitHub!!!
Loading a Grades project with Gitpod
The following is a quick-start for opening a project on Gitpod. Before you do this, follow the steps in the Getting Started With Gitpod section below. Those steps need to be done the very first time you setup Gitpod.
We will create a workspace for each project that we work on. Each workspace is based on a GitHub repository (i.e., a folder with some code in it; a.k.a., repo).
To create a Gitpod workspace based on a repo, in the address bar of your browser enter https://gitpod.io/# and then the URL of the repo. For example,
1
https://gitpod.io/#https://github.com/<your-username>/<project-name>
This will take you to a “New Workspace” screen on Gitpod. You can accept the default settings and hit “Continue”.

This will take a minute or two to setup the workspace, but reopening the workspace will be much faster.
You can manage your workspaces on the Gitpod dashboard:
There, you can find options to stop and re-open workspaces and more, using the ... menu next to each workspace, just like you did with your Codespaces at github.com/codespaces
Assessment Details
Review your overall progress for this lesson
| Assessment Title | Earned Points | Current Progress | Assessment Points |
|---|---|---|---|
| Totals | 0 | 0% | 0 |
No highlights created for this lesson
Create a highlight by selecting any text in this lesson, and ask a question about it.