Follow these instructions to fork a project to your personal GitHub account, open a workspace, and get automated feedback with rake grade.
Quick links
Please read the lesson below. But, for future reference, here are some quick links:
Fork the project repository
When you load a Grades project, you’ll arrive at a page with several links.
Your first step will be to open link to fork the project:

This will take you to my copy of the project, containing any starter code, on GitHub.com. “Repository” is Git’s term for “a folder containing code”. We also often say “repo”, for short.
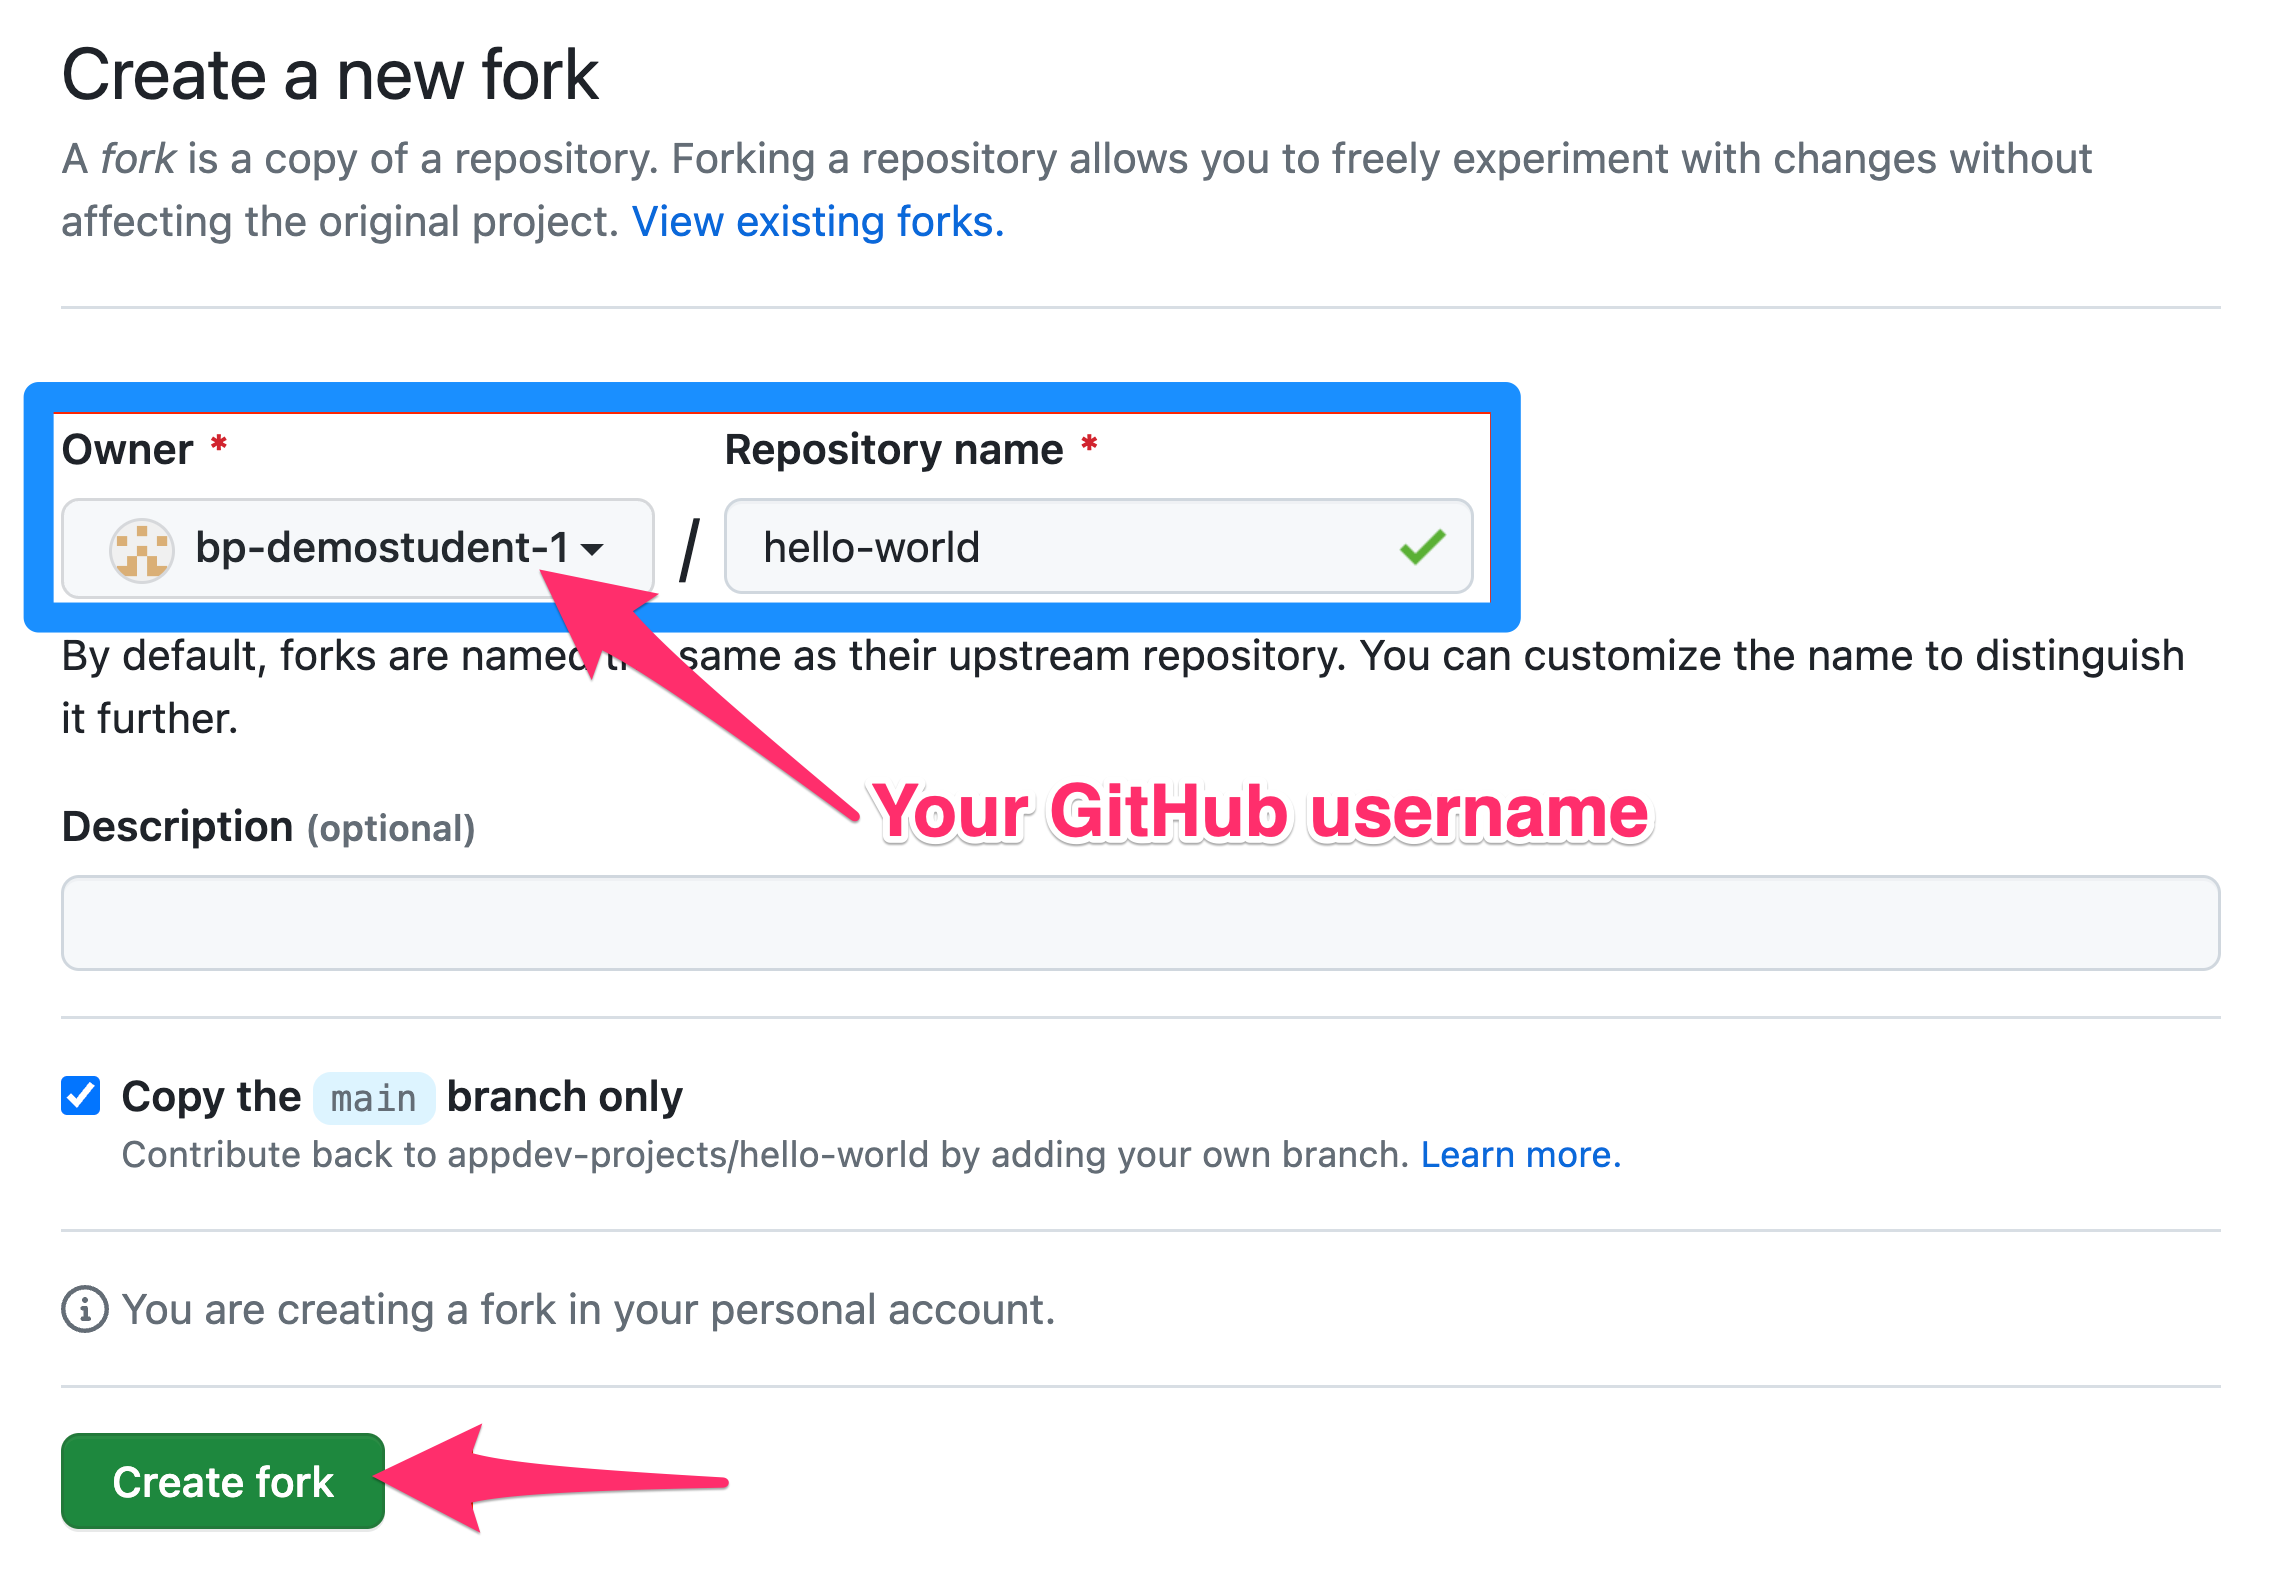
The next step is to create your own copy of the starter code, so that you can save your work and have it forever. GitHub calls these copies “forks”.
On the “Create a new fork” page, make sure that your personal GitHub username is set as the “Owner” and that your copy’s name is the same as mine.
Now click “Create fork”:
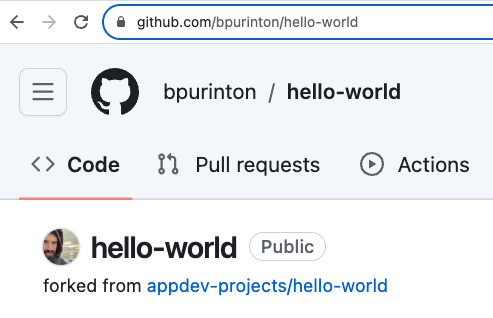
It will take a few seconds to make a copy, and then you should end up on a page for your own fork of the repository.
If all went well, you should see github.com/<your-username>/<project-name> in your address bar, and a note “forked from appdev-projects/<project-name>”:
GitHub Codespaces
One of the most painful parts of learning how to program, in the old days, was simply setting up your computer to be able to write and run code. At a minimum, we needed to install:
-
An application to write your code with. Something like Microsoft Word is not be ideal for writing code, since code needs to be plain text (just a series of characters in a file, nothing else) for the computer to understand it. Word is designed to write rich text (for humans) with fonts, colors, sizes, margins, layouts, etc.
-
Ruby itself. Writing code is not useful on its own if we don’t have something to run it with; just like we need a browser installed to interpret
.htmlfiles we need Excel installed to interpret.xlsfiles, and we need Photoshop installed to interpret.psfiles, we need Ruby installed in order to interpret the.rbfiles that we write.
There are so many different combinations of hardware, operating systems, previously installed software, permission levels (for example if you are using a work-owned computer), that just getting these things installed would often stop you before you started writing your first program. We can’t allow that!
Instead, we’re going to use a write our code using a cloud computer. “Cloud” just means that it’s a computer that’s sitting in someone’s warehouse somewhere, and we rent it from them. It already has all of the software that we need installed on it, and we access it through our browsers. No muss, no fuss!
GitHub happens to have an excellent cloud editor integrated into it: GitHub Codespaces.
GitHub Codespaces is a great new service that provides instantaneous, full-fledged cloud development environments from any codebase that is on GitHub.com — which is great, because we (and 98% of other teams) use GitHub to store all of our projects, homeworks, etc. The text editor they provide is based on Microsoft’s VSCode — my editor of choice. It will have the exact right version of Ruby, Rails, and everything else we need. And they have a very generous free tier. Great!
Getting started With Codespaces
To setup a codespace, all you need to do is follow these instructions to open and manage your codespace.
Navigating VSCode may seem tricky at first, but with a little practice you’ll get used to it in no time. We have a helpful VSCode guide for reference.
Importantly, whenever you are working on any project, don’t forget to commit and push using our Git workflow so that your work is saved on GitHub. Follow these instructions for those steps.
Getting automated feedback
For many projects, we have automated tests built in. Your first job is always to make your app work as described and test it manually yourself. If there is a target app, use that for reference. Debug your live app preview by Reading The Error Messages. You should not rely exclusively on the automated tests; they are a terrible way to debug.
When you’re ready for feedback visit our rake grade lesson for detailed instructions on getting automated feedback
Assessment Details
Review your overall progress for this lesson
| Assessment Title | Earned Points | Current Progress | Assessment Points |
|---|---|---|---|
| Time taken | 0.0 |
|
1 |
| Totals | 0 | 0% | 1 |