Always Be Committing. And “sync” your work to push it from your codespace for safekeeping in the GitHub project repository. Codespaces are ephemeral; don’t lose your hard work!
If you got your GitHub setup and you can fork assignment repositories, work on projects in Codespaces, and run rake grade for feedback, you are in great shape! But, if you want to save all of your work, you will need to learn about and use git. Please note, your work will not be saved if you do not push to Github.
What Git is
Git is an extremely powerful version-control system created by Linus Torvalds in 2005 for development of the Linux kernel, which is one of the largest open-source software projects in existence. It makes it possible for large numbers of contributors to work on various features, all within a single codebase (which could be comprised of hundreds or thousands of files).
Bitbucket, GitLab, and especially GitHub (all private companies) rode the rise of Git (the protocol) to become the center of the software development universe. All of these companies basically offer cloud-based storage for codebases using Git for version-control (we refer to these codebases as repositories or repos), as well as a web-based interface for collaborating on them — following, commenting, etc.
Using Git in your projects
In this course, we’re going to use one simple but effective Git-based workflow to save versions of our work. This will allow us to freely experiment with different approaches, while never having to throw away code.
Whichever environment you are working in, we expect that you are using VSCode as your code editor and integrated terminal.
In you VSCode window, you can note a few tabs on the left side bar:
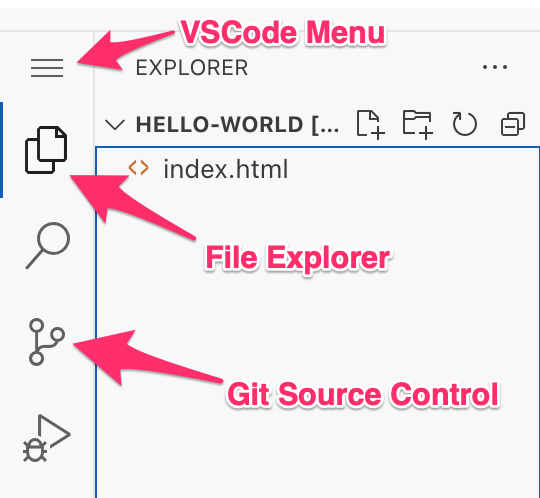
For now, we just need to know about the “hamburger” menu with access to the VSCode settings, the file explorer that shows us all of the files and directories in our workspace, and the “Source Control” tab, which is how we interact with Git.
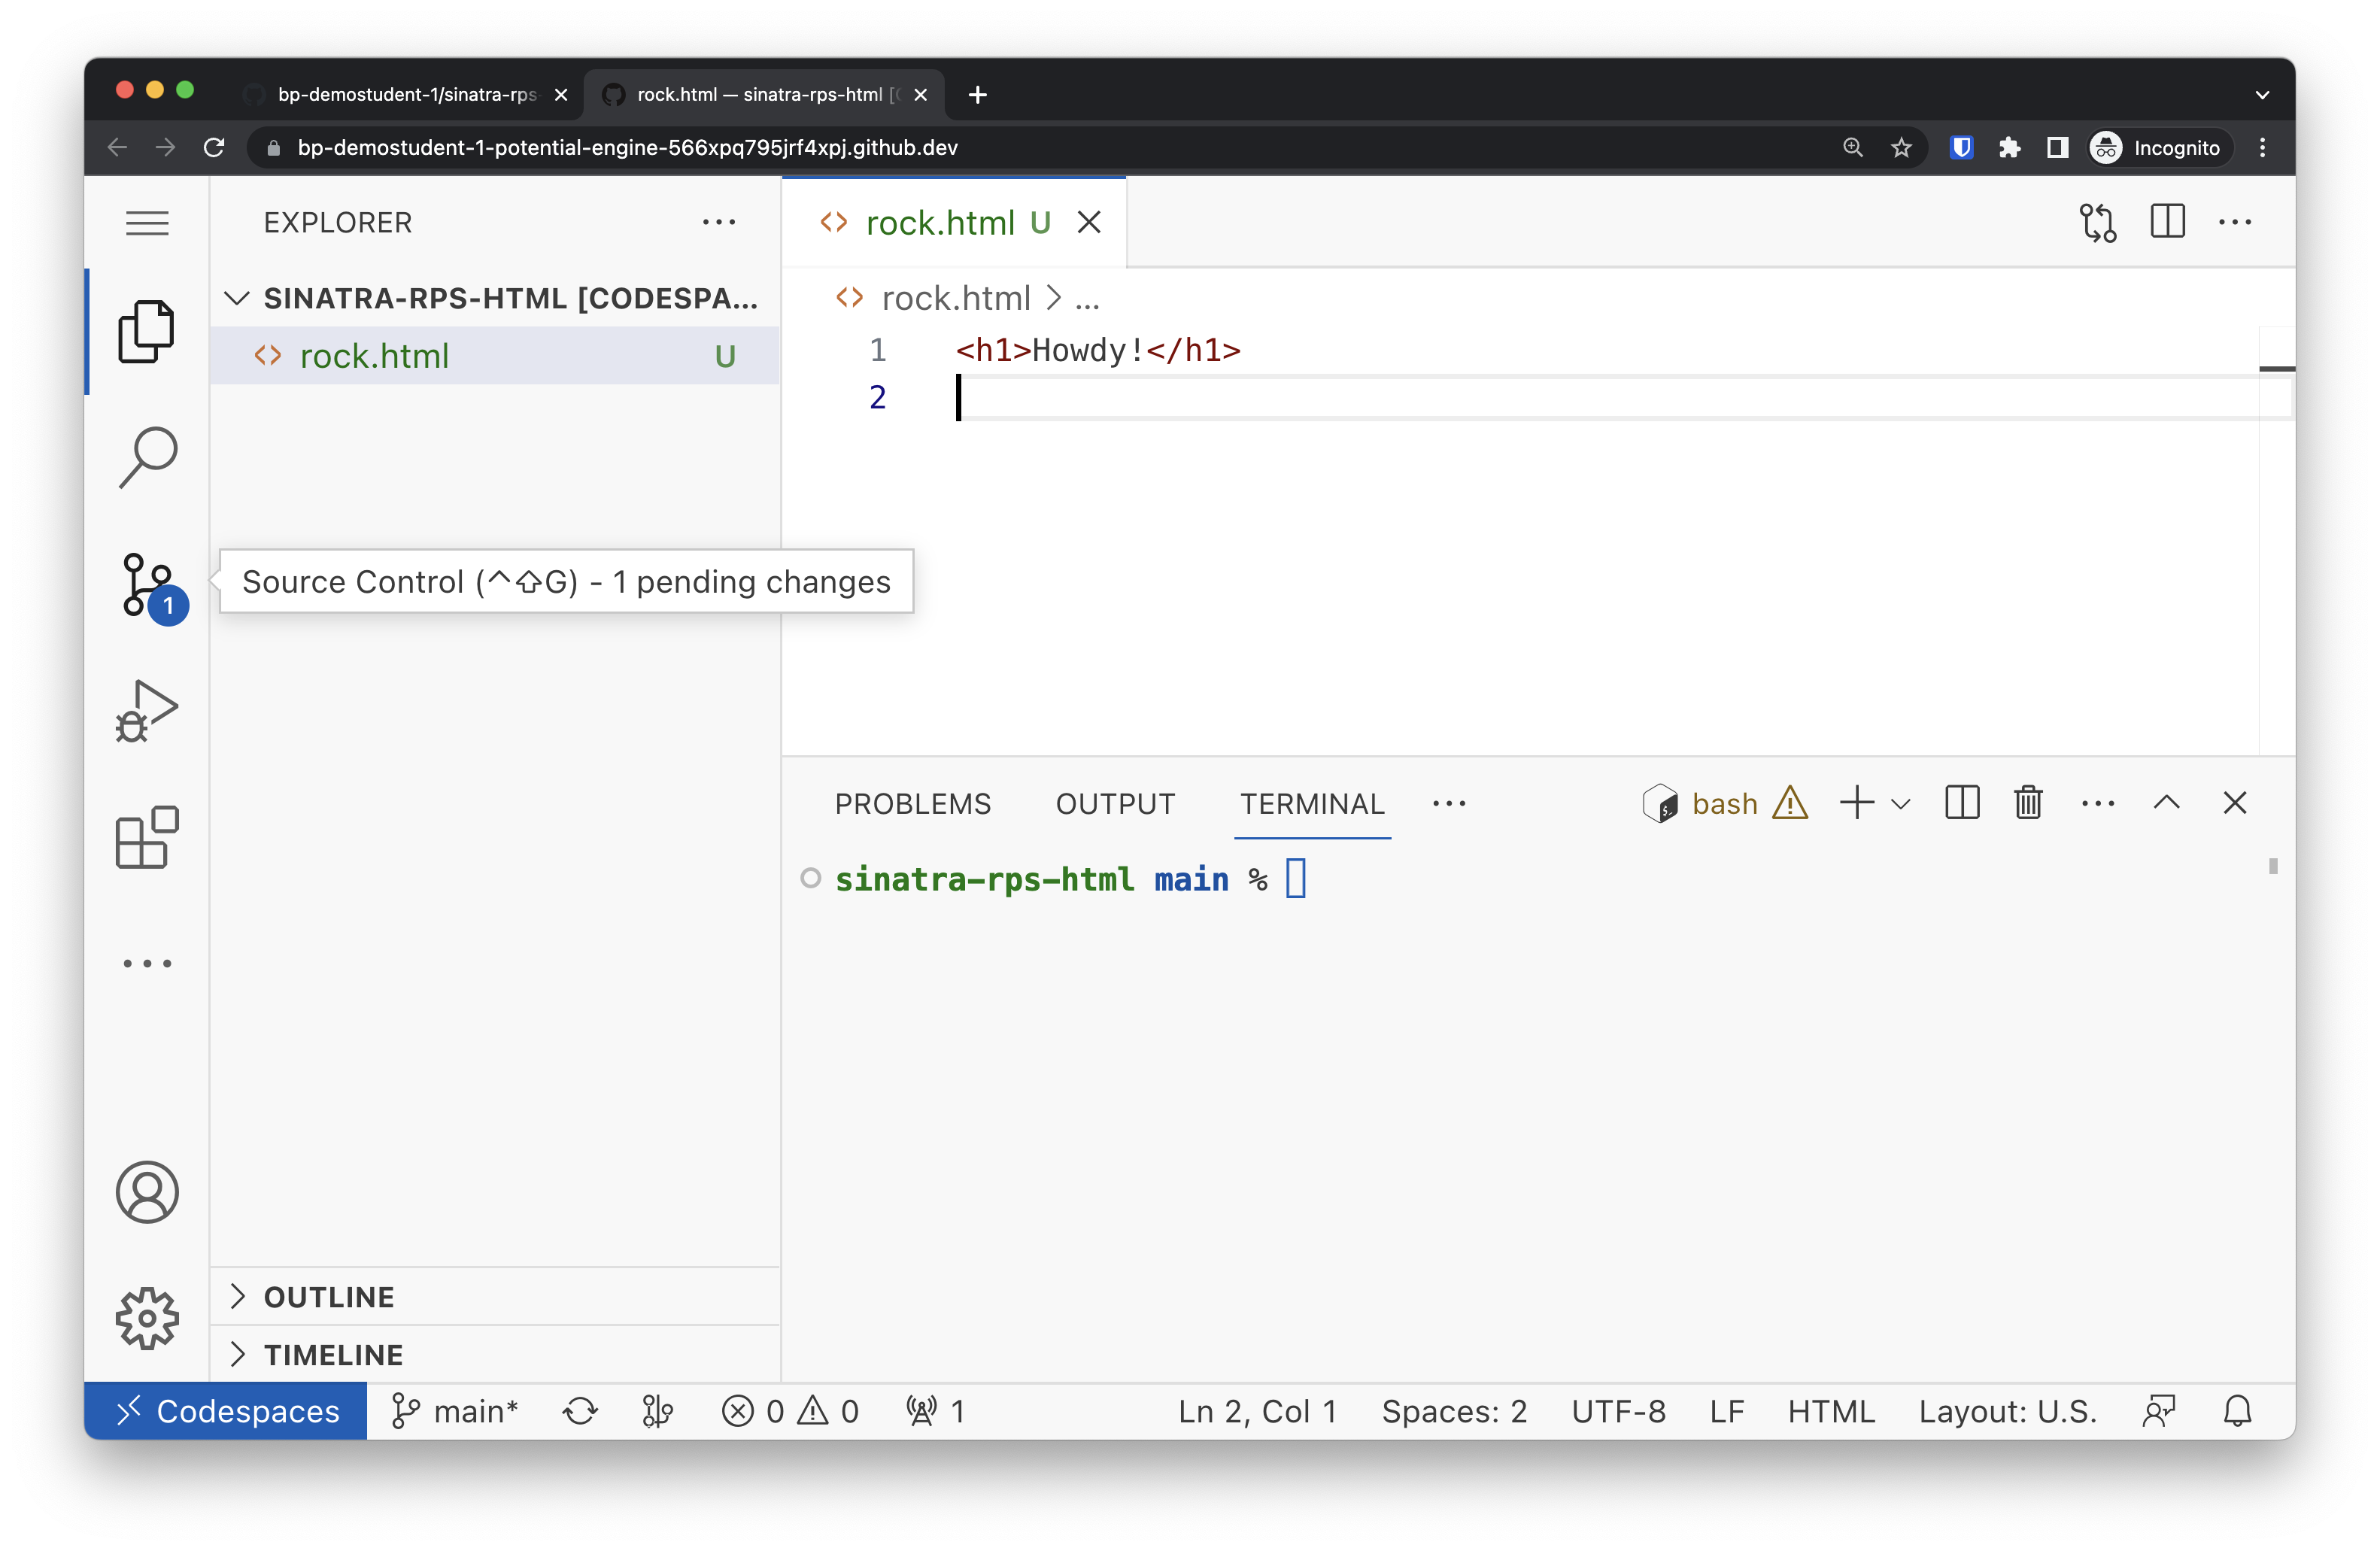
When you create any file or make changes to an existing file, you should see the file color change in the explorer and editor, and an icon with a number show up on the Source Control tab, indicating the number of “pending changes”:
You can open the Source Control tab to view a list of the changed files. Click on any file in this view and a new editor tab will open:
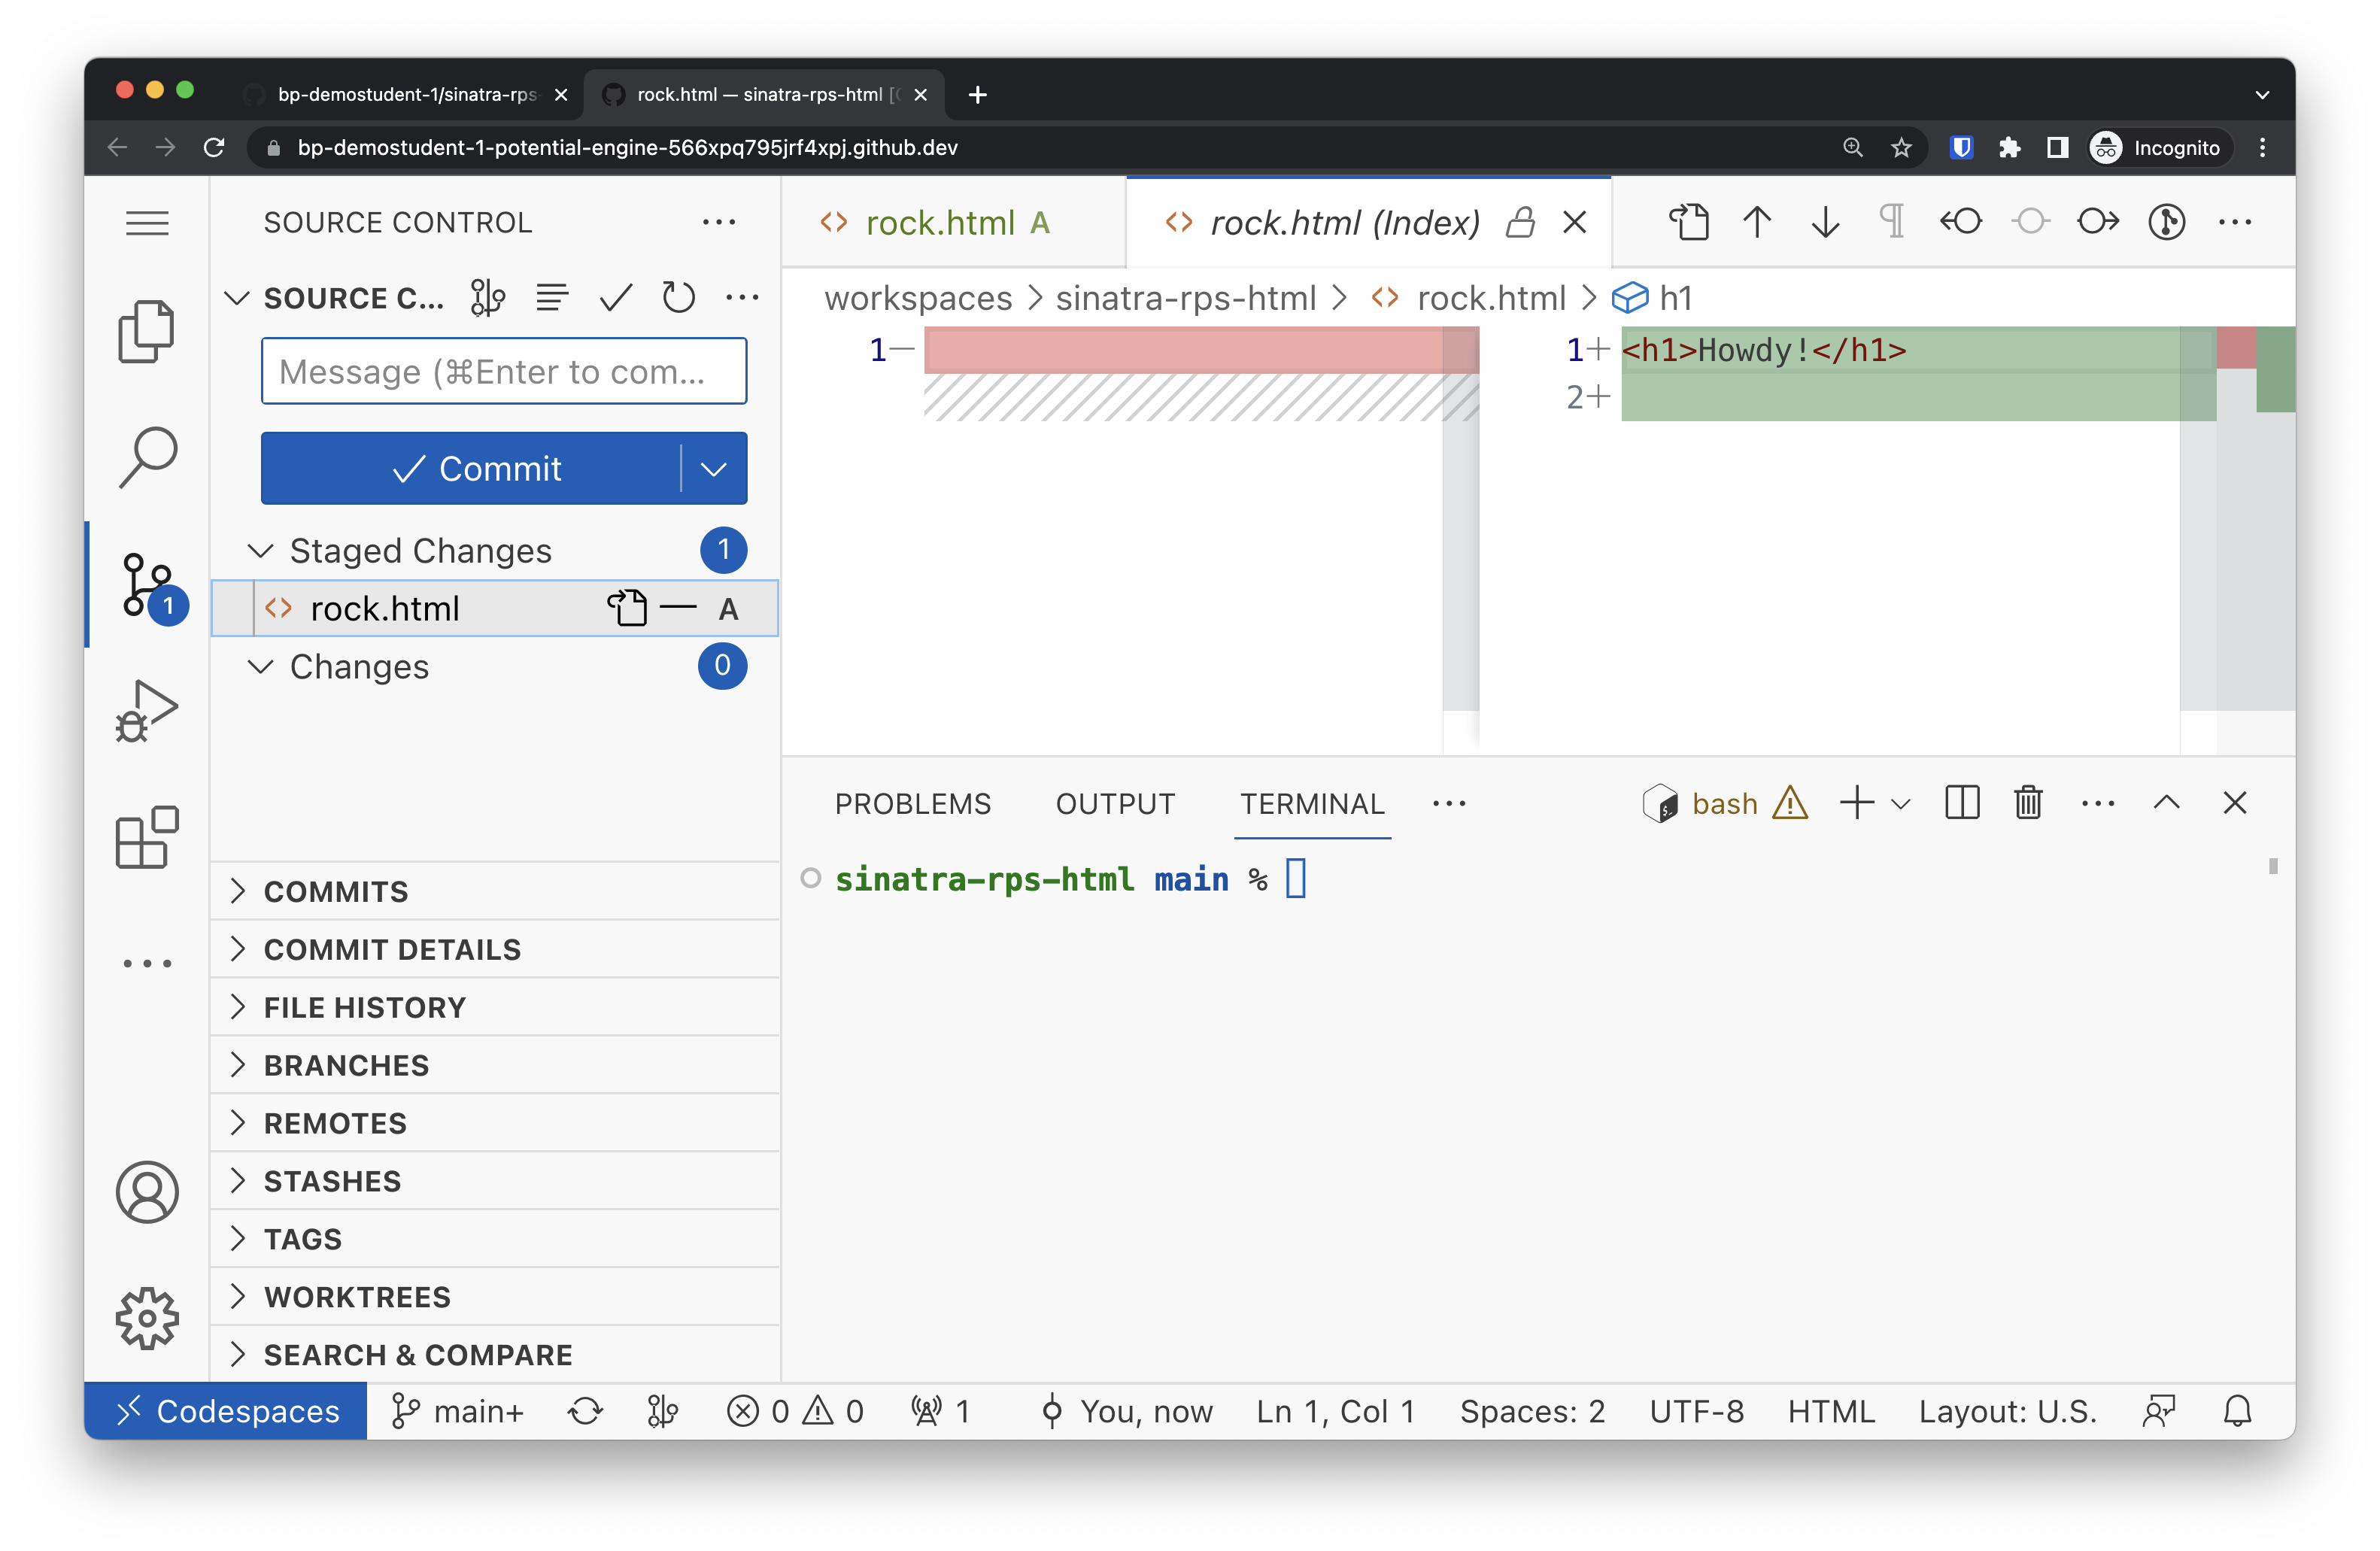
On the left, you see the code as it was previously; on the right, you see the new code. Lines added are highlighted in green, lines removed are highlighted in red.
There are quite a few Git operations we can do, but we want to focus on the two most important: commit your changes, and switch to a new branch. When you hear the word “commit”, think “snapshot”. When you hear the word “branch”, think “version”.
A Git commit is a snapshot of all of the folders and files in your project at a particular time. Since our files of code are all interdependent, it doesn’t make sense to save versions of individual files — we need to know the entire state of the project for a version to be useful.
Each branch (“version”) is a series of commits (“snapshots”).
Committing changes
The most important thing for you to remember is simple: commit early and commit often. As long as you are taking snapshots of your work at various points, it will always be easy to get back to a previous state in case you want to start over and explore a different approach.
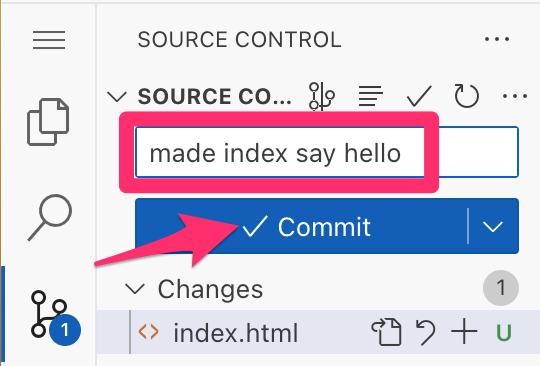
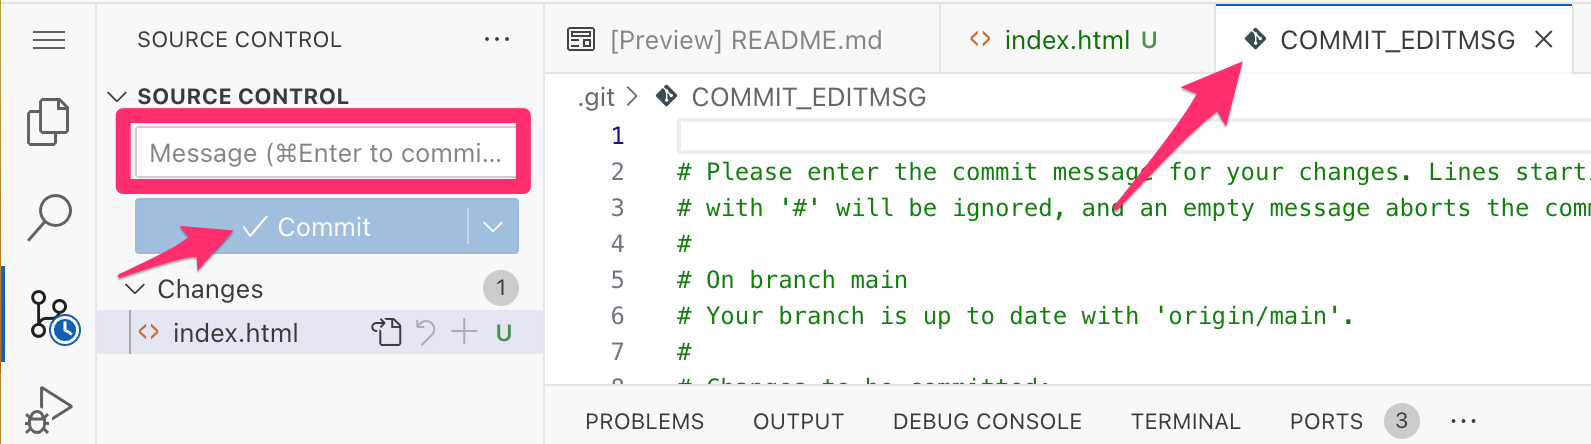
To commit, enter a short message for the snapshot (required), then press “Commit”:
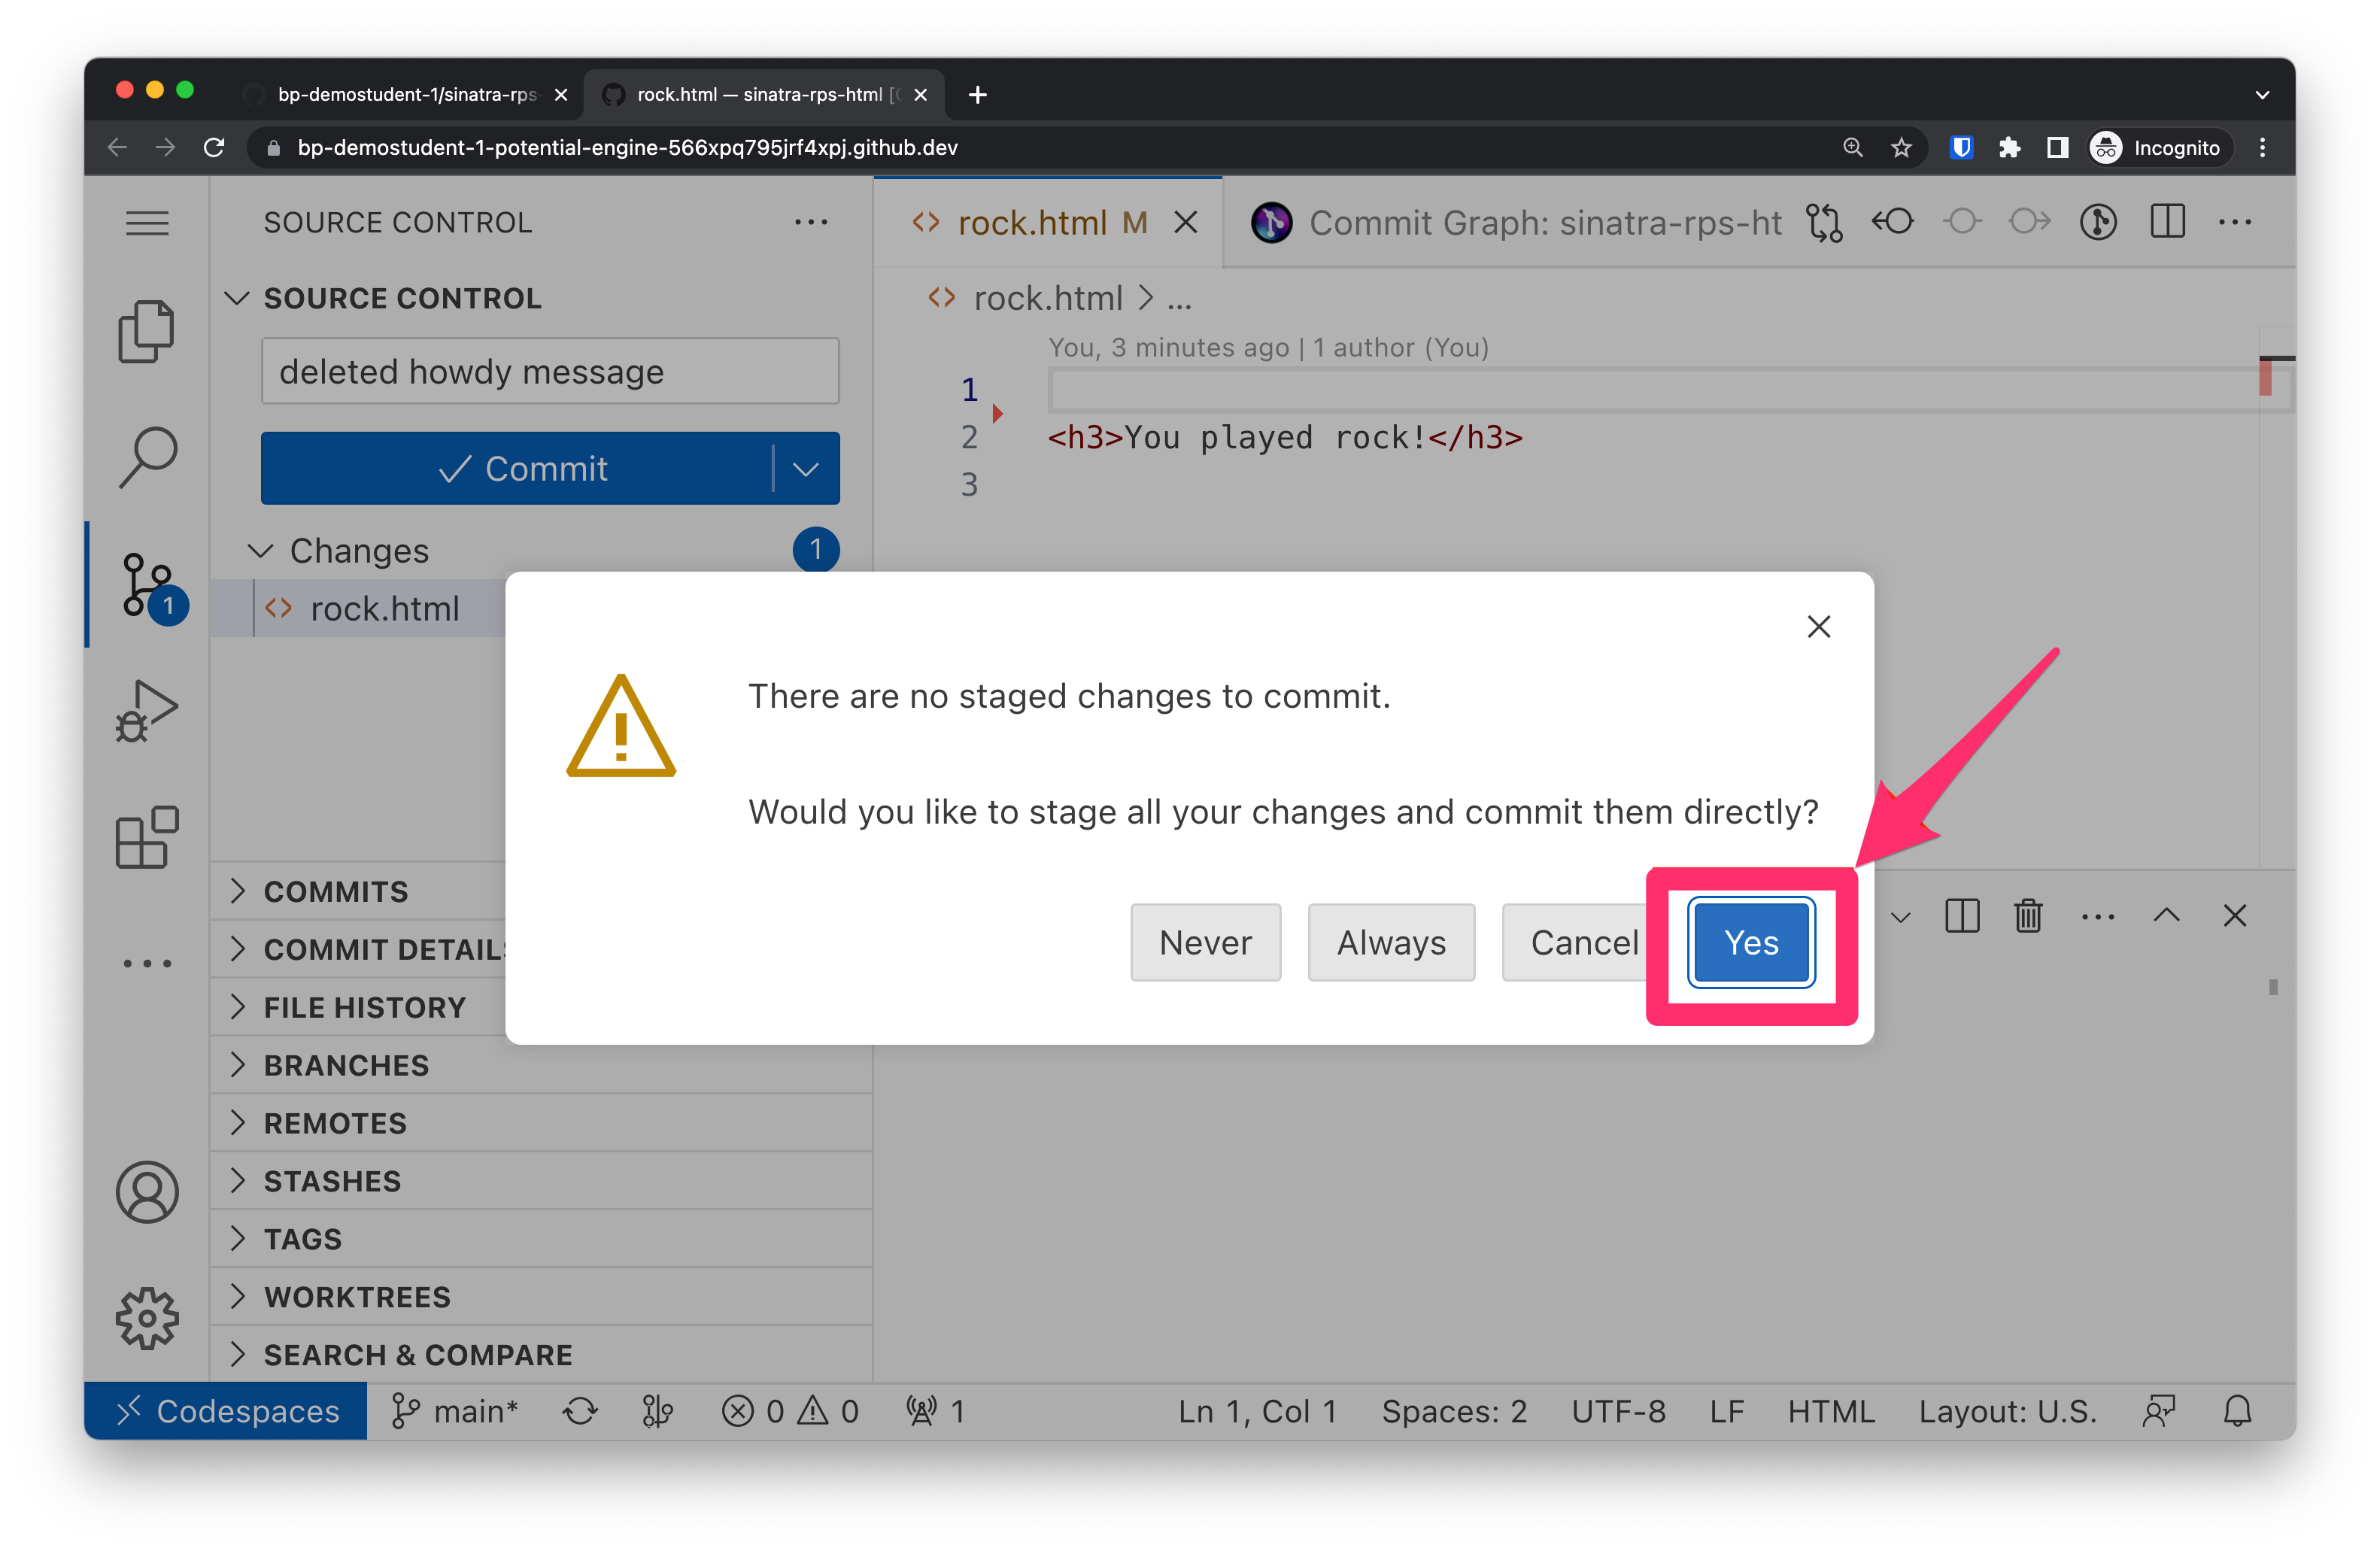
When you click “Commit”, if you have not staged your changes, which you can think of as putting the changes in a “waiting room” for the snapshot, you will see a message pop up asking if you would like to “stage all your changes and commit them directly”. Click “Yes”:
If you do not enter a commit message, then a window will open in the VSCode editor, and you will need to enter a commit message there then close the window to proceed. You cannot commit without a message.
After you commit, you will no longer have any pending changes and you can return to the “File Explorer” tab on the left side and continue working.
If you edit your code again, then you can make further commits in the Source Control tab.
Fundamentally, that’s all you need to worry about: just make lots of commits as you work.
The best time to commit is right after you just got something to work, before you start on your next experiment.
Remember: ABC: Always Be Committing (ABC).
Push to GitHub
Codespaces are not permanent! Even if we make git commits, if the workspace is deleted so is all of our work! This is where GitHub comes in. We can push all of the commits we’ve made to our repository on GitHub where it will live forever. If our workspace gets destroyed we can just re-create another one from the latest commit on GitHub!
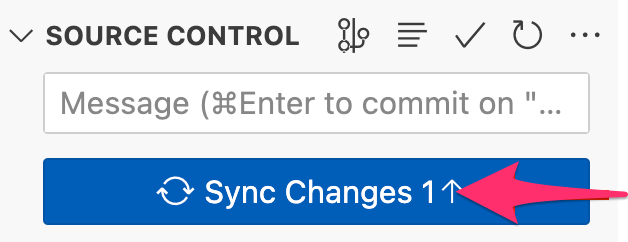
Did you notice the “Commit” button change to “Sync” each time after you submitted a git commit? Maybe you even noticed the number changes to sync increasing with each separate commit you made?
Whenever you are ready to store your changes on GitHub, click the “Sync” button, and when you get the pop-up message, select “Ok, Don’t Show Again”:
You may get a message after this first sync asking if you would like to periodically run “git fetch”. You can say “Yes” to this.
You should get into the habit of committing and pushing your code to GitHub very often. If you do, then you’re certain never to lose your work, among many other benefits of using GitHub to store your code.
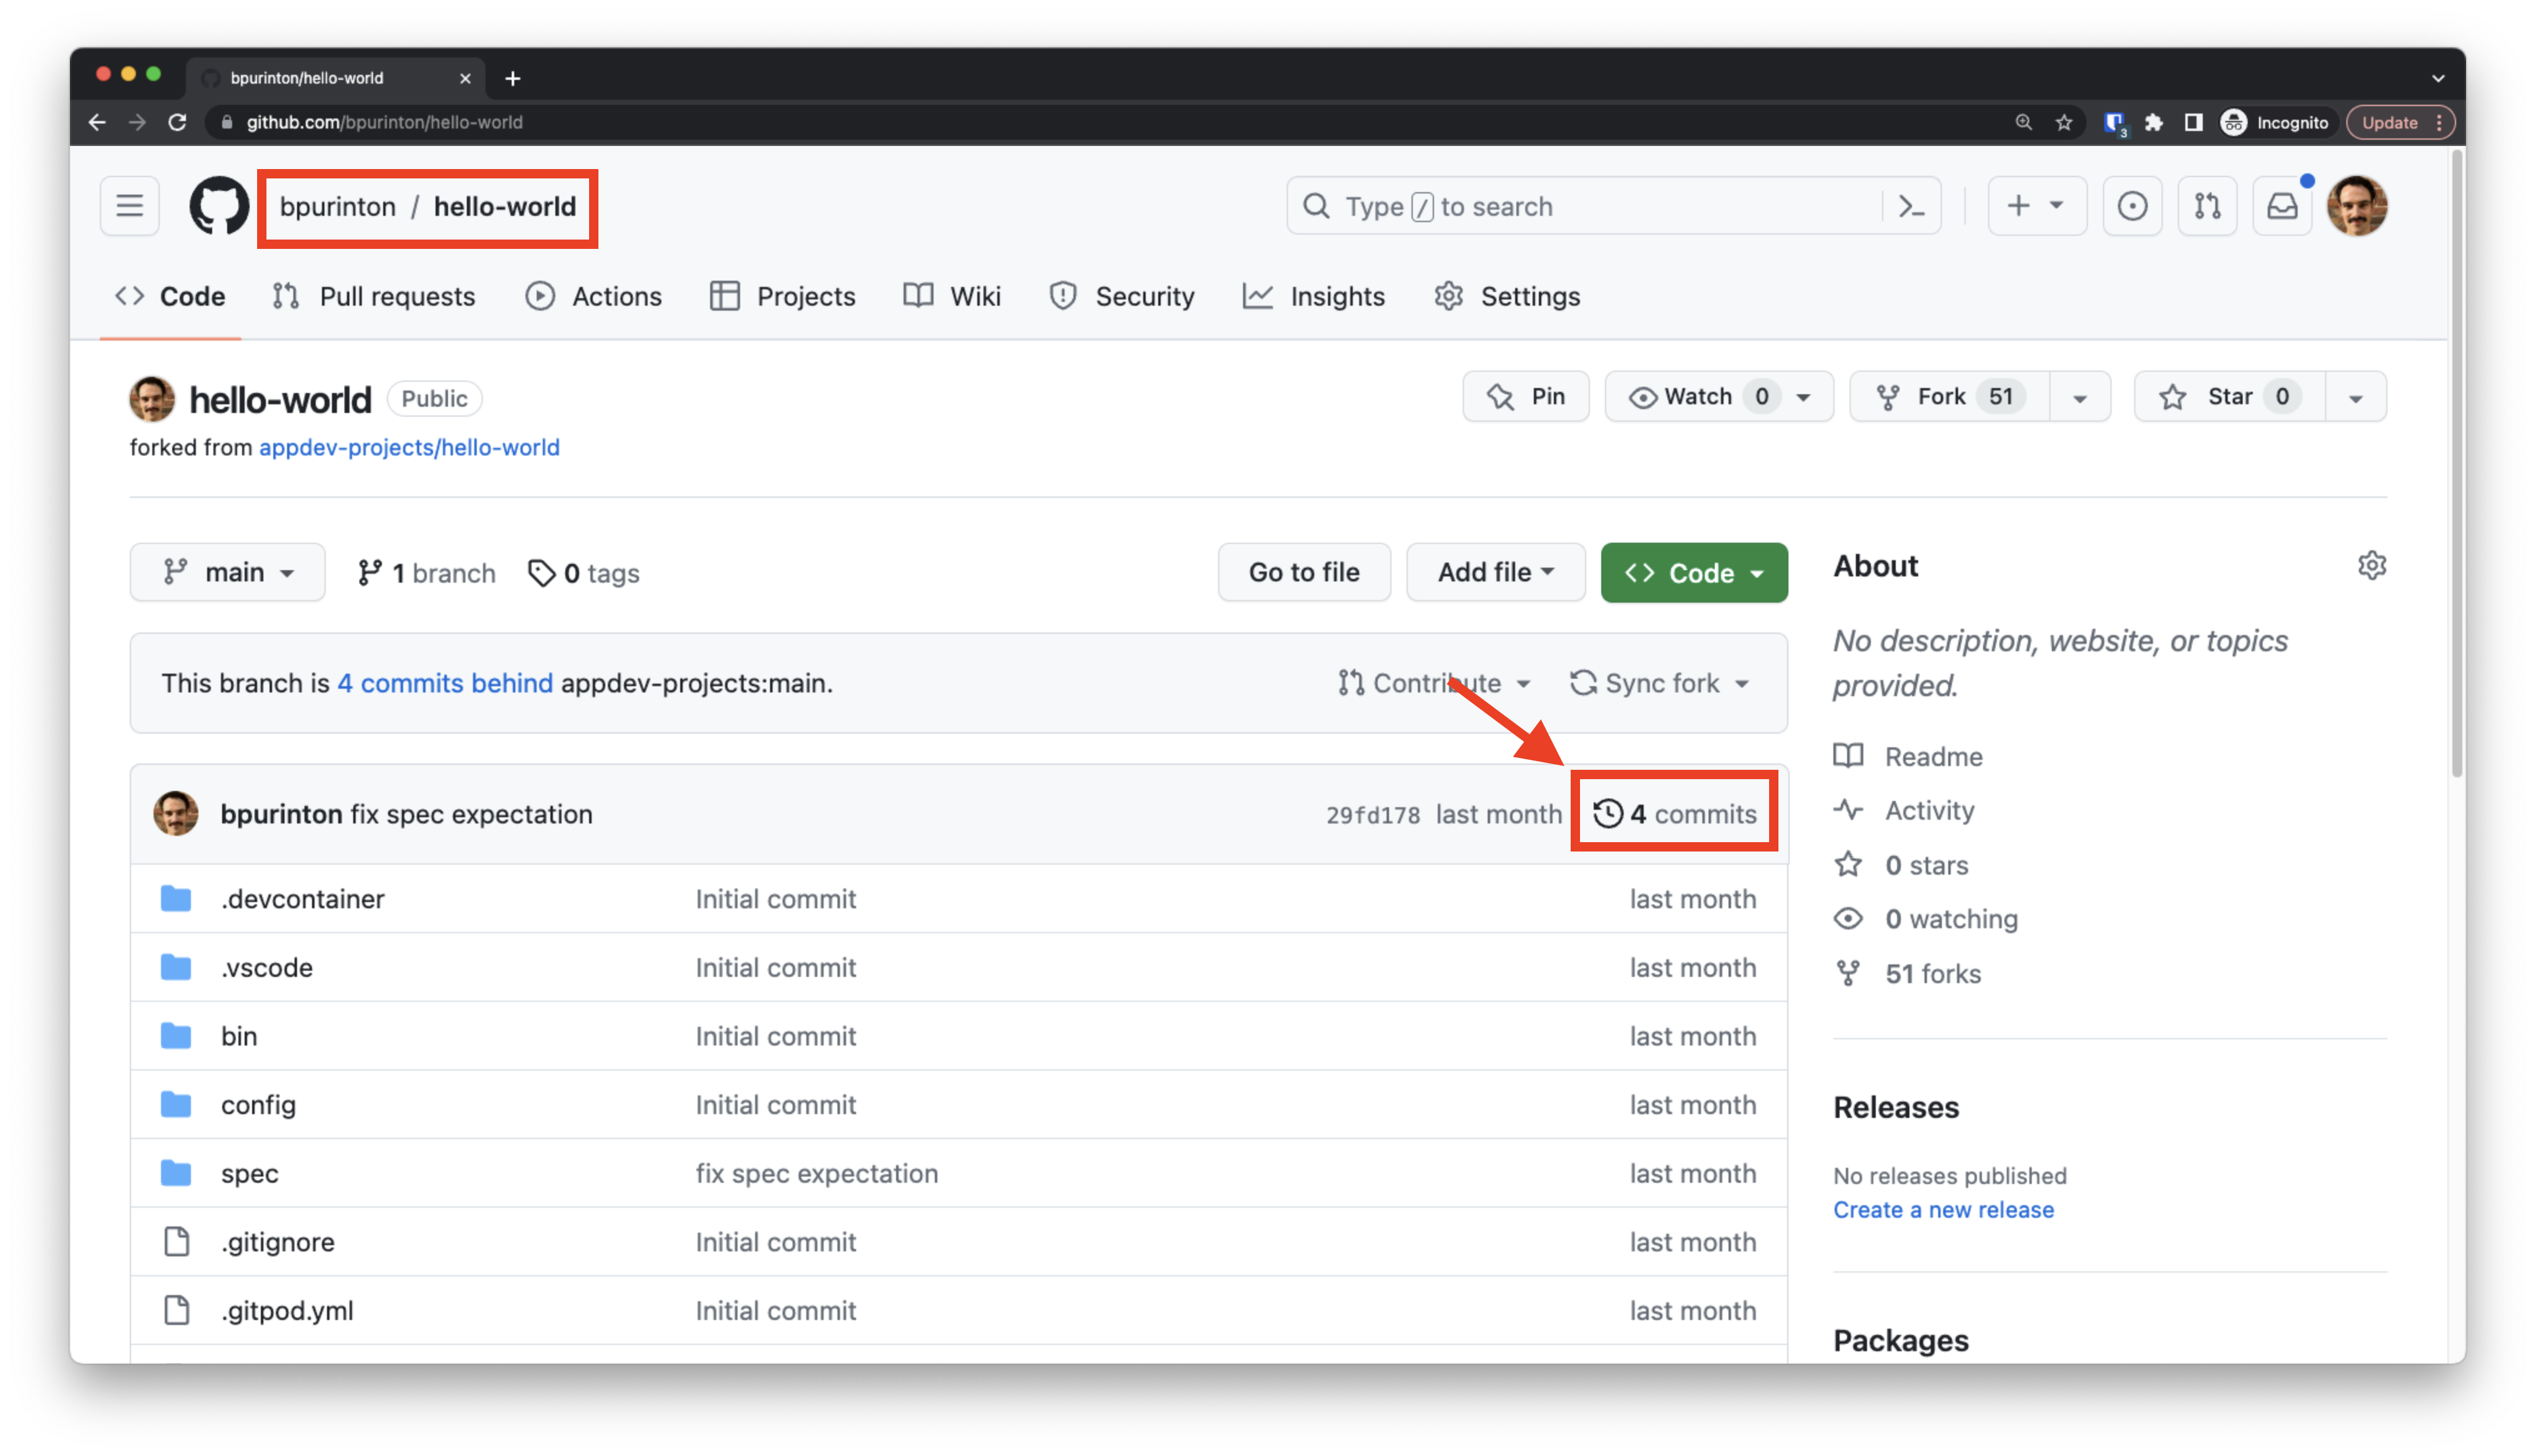
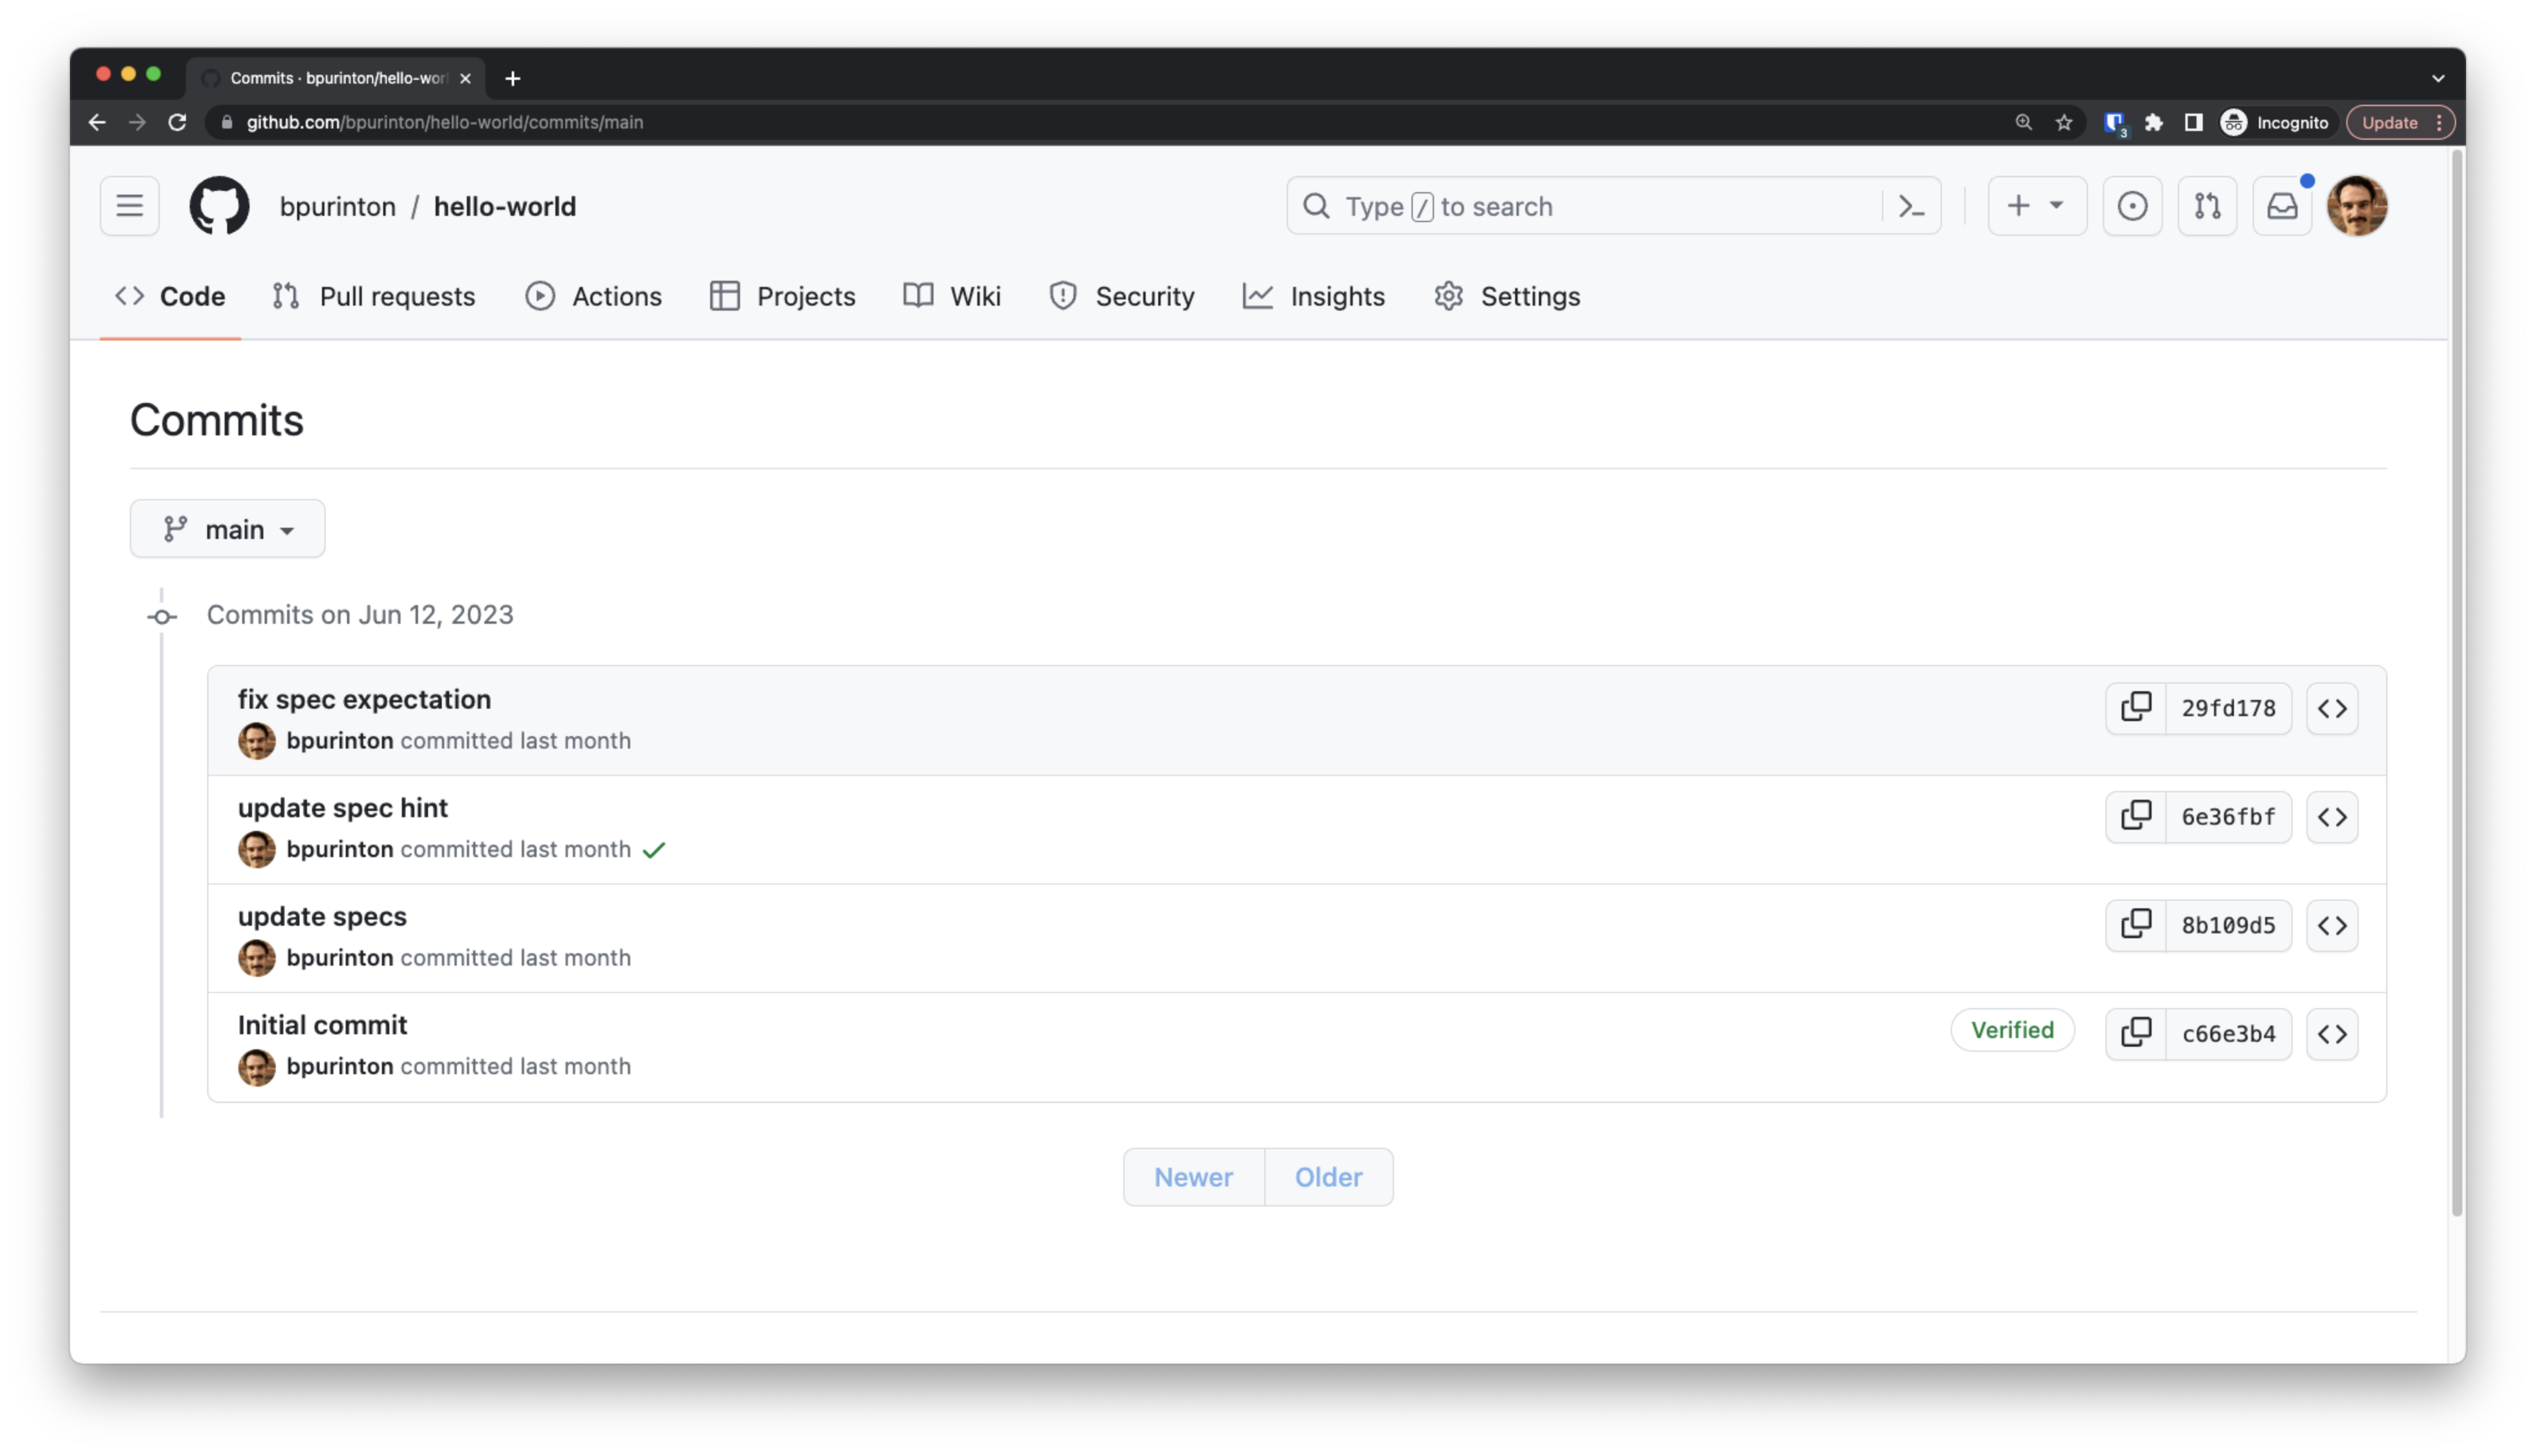
When you push the code, each commit you made gets registered in the history of your fork of the GitHub repo. In other words, you can view any given snapshot of your code, at any time, forever. Yay!
Visit the repo at github.com/<your-username>/<project-name> to see the published commits, stored safely forever:
Branching and Merging
Do you ever wish you could work on a completely separate version of your project in parallel to the current version? Perhaps to test an approach, or work on a new feature? And you want the option to eventually combine that code into your main project codebase?
Well, have a look at our documentation on branching and merging in VSCode with GitLens!
Assessment Details
Review your overall progress for this lesson
| Assessment Title | Earned Points | Current Progress | Assessment Points |
|---|---|---|---|
| Totals | 0 | 0% | 0 |