You’ve gotten used to creating lots of commits and pushing those commits to GitHub so they are published forever and you never lose any work. That’s great! Now let’s look at some additional, common Git workflow steps to levelup.
Using GitLens for project history
There is a powerful VSCode extension that we pre-installed in all of our workspaces called GitLens. This extension has many git-related features, but we’ll just focus on a few essentials.
Commit Graph
Your interface with the project history should come primarily through the graphical representation of your branches and commits provided by the Commit Graph in GitLens.
To open the Commit Graph, click on the graph icon in the Source Control tab:
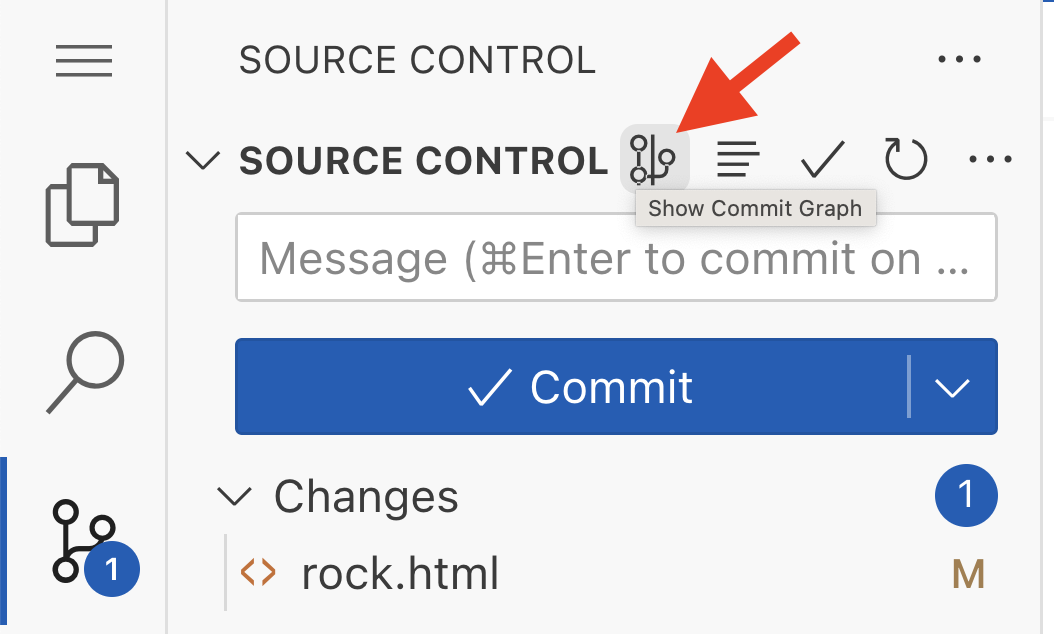
Note that you can also find this button along the very bottom of the workspace window for another way to access the graph without visiting Source Control.
However you open the Commit Graph, you should see a new editor tab pop up with a table that looks something like this:
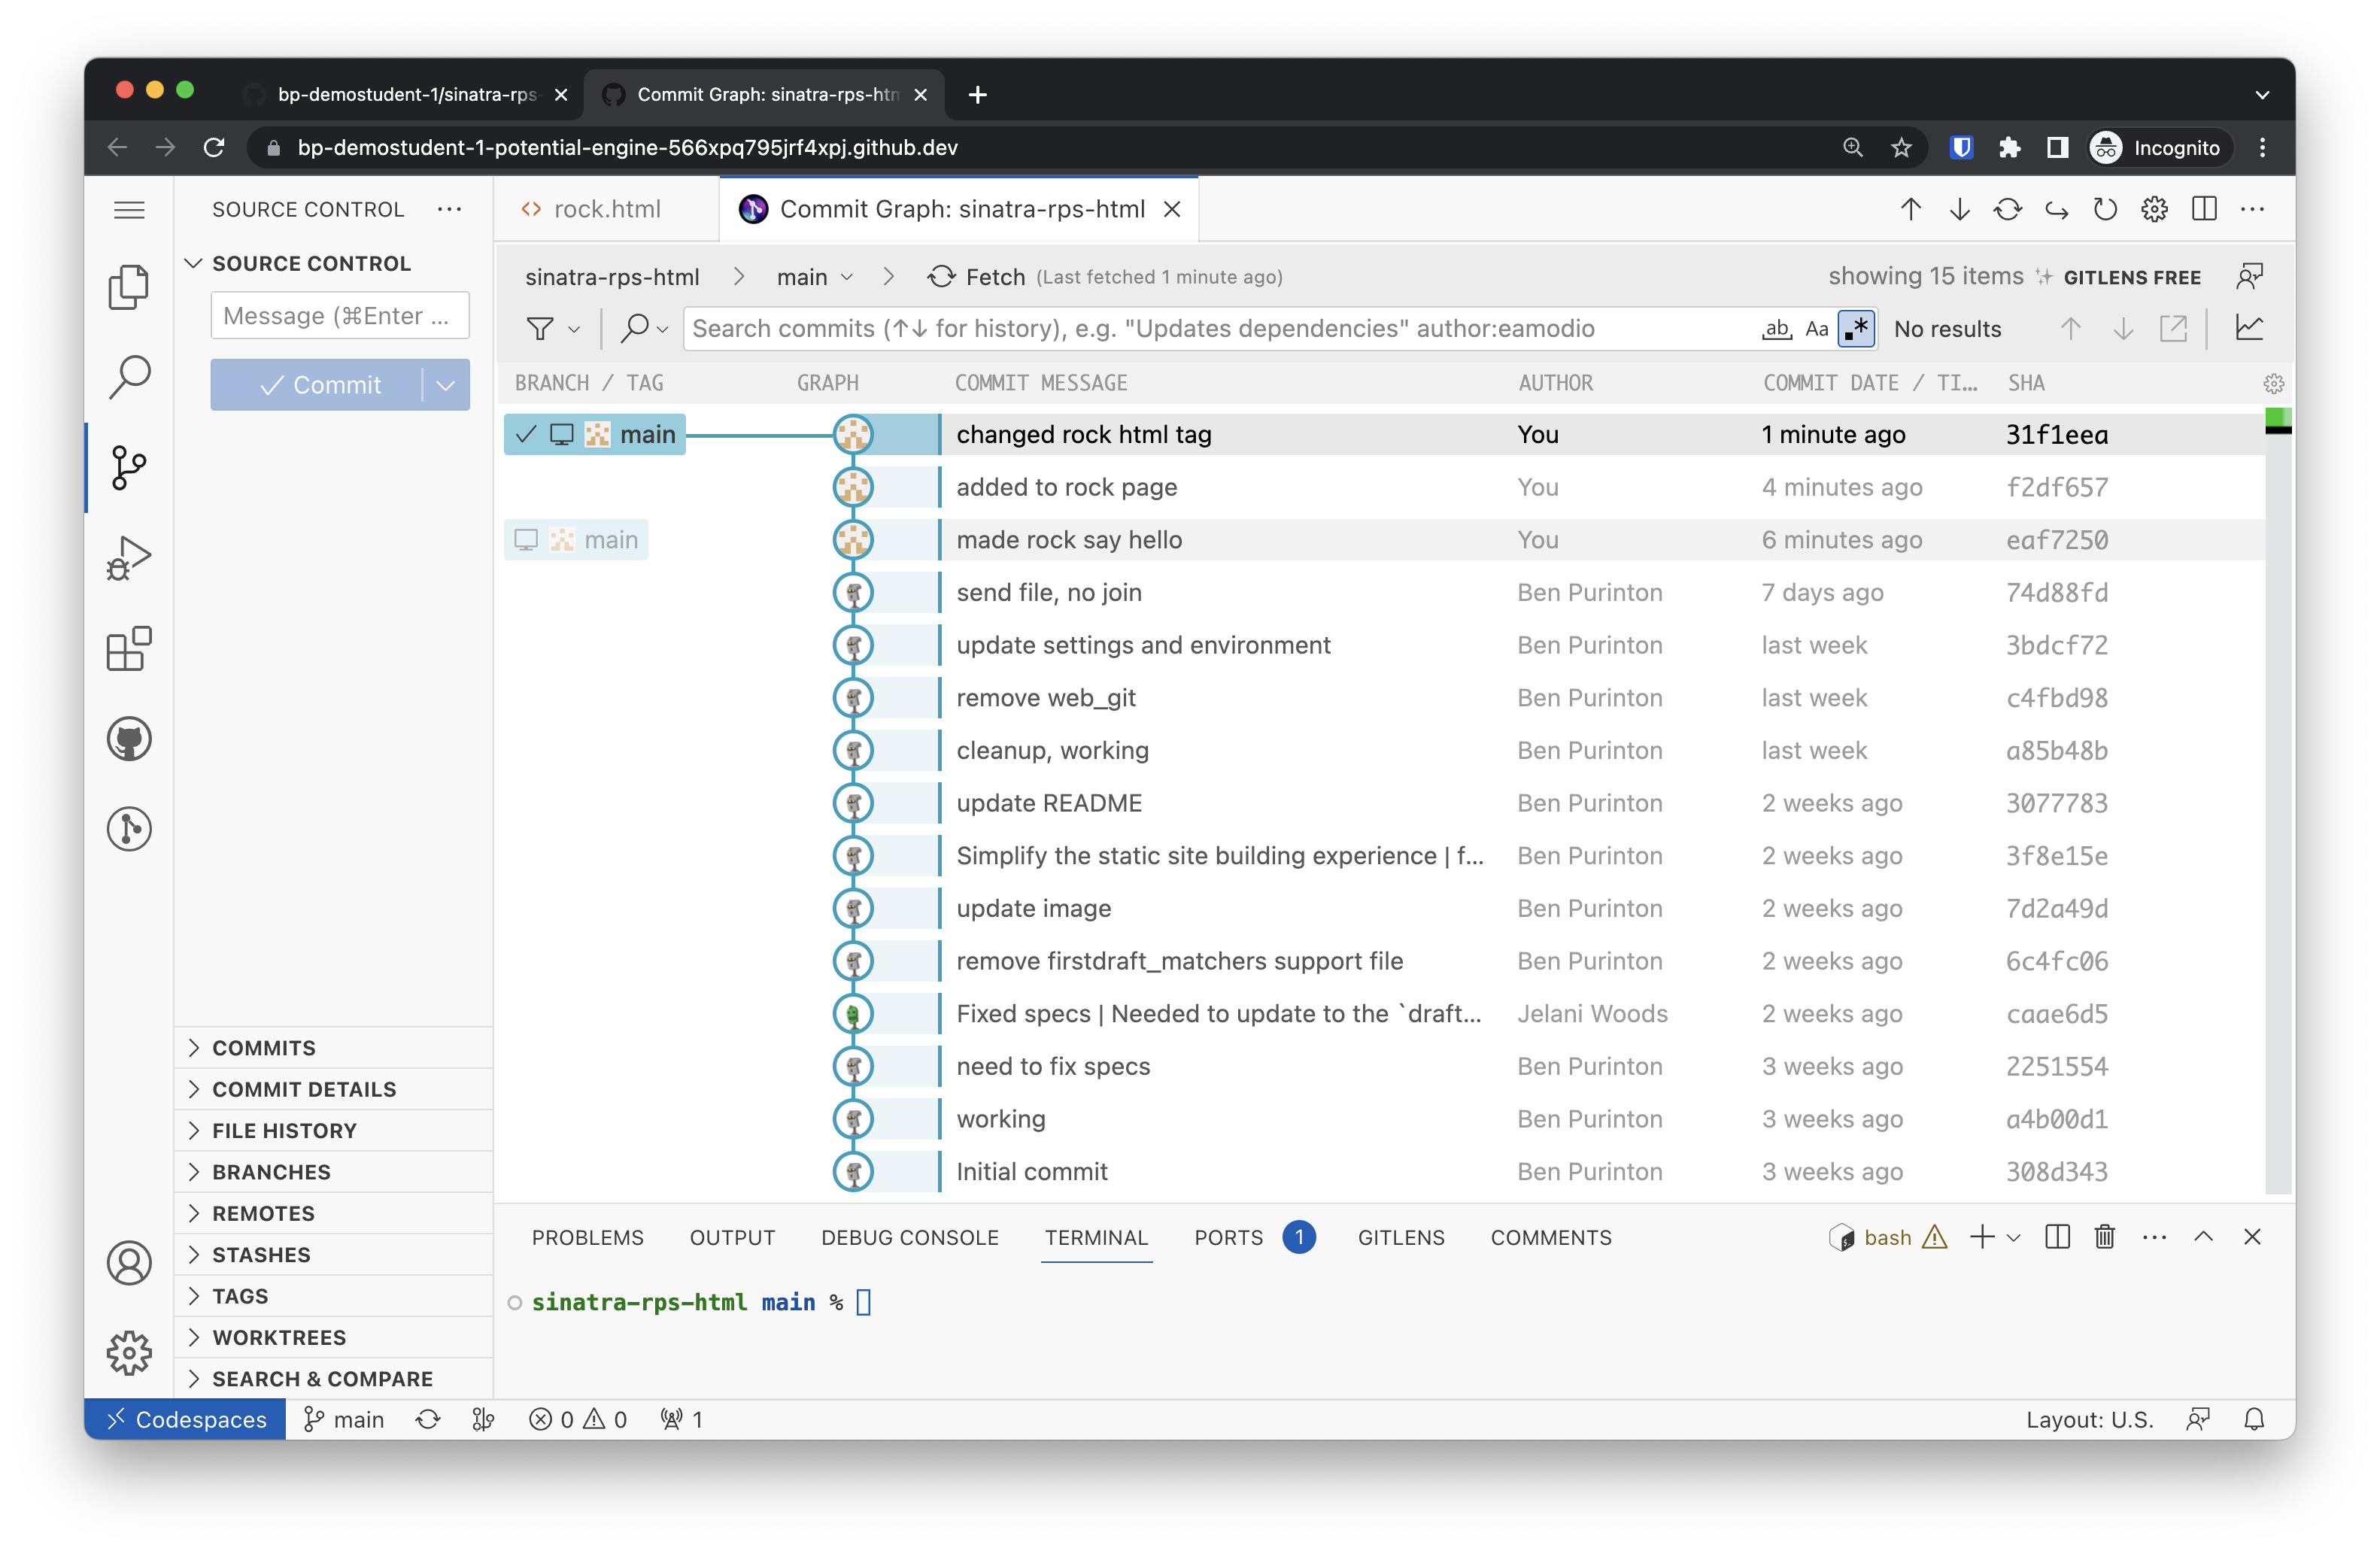
There are columns for:
-
the branch name (a checkmark ✔ indicates the branch that you are currently on; in this example that is
main); -
the “graph” view with lines representing branches and circles representing commits on a respective branch;
-
the commit message, author, and date;
-
the commit “SHA”, which is the unique identifier for that commit.
Jumping back in time
The Commit Graph contains a row for each of the commits you’ve made. If you want to jump back in time to one of them, right click on the commit message and select “Create Branch…”:
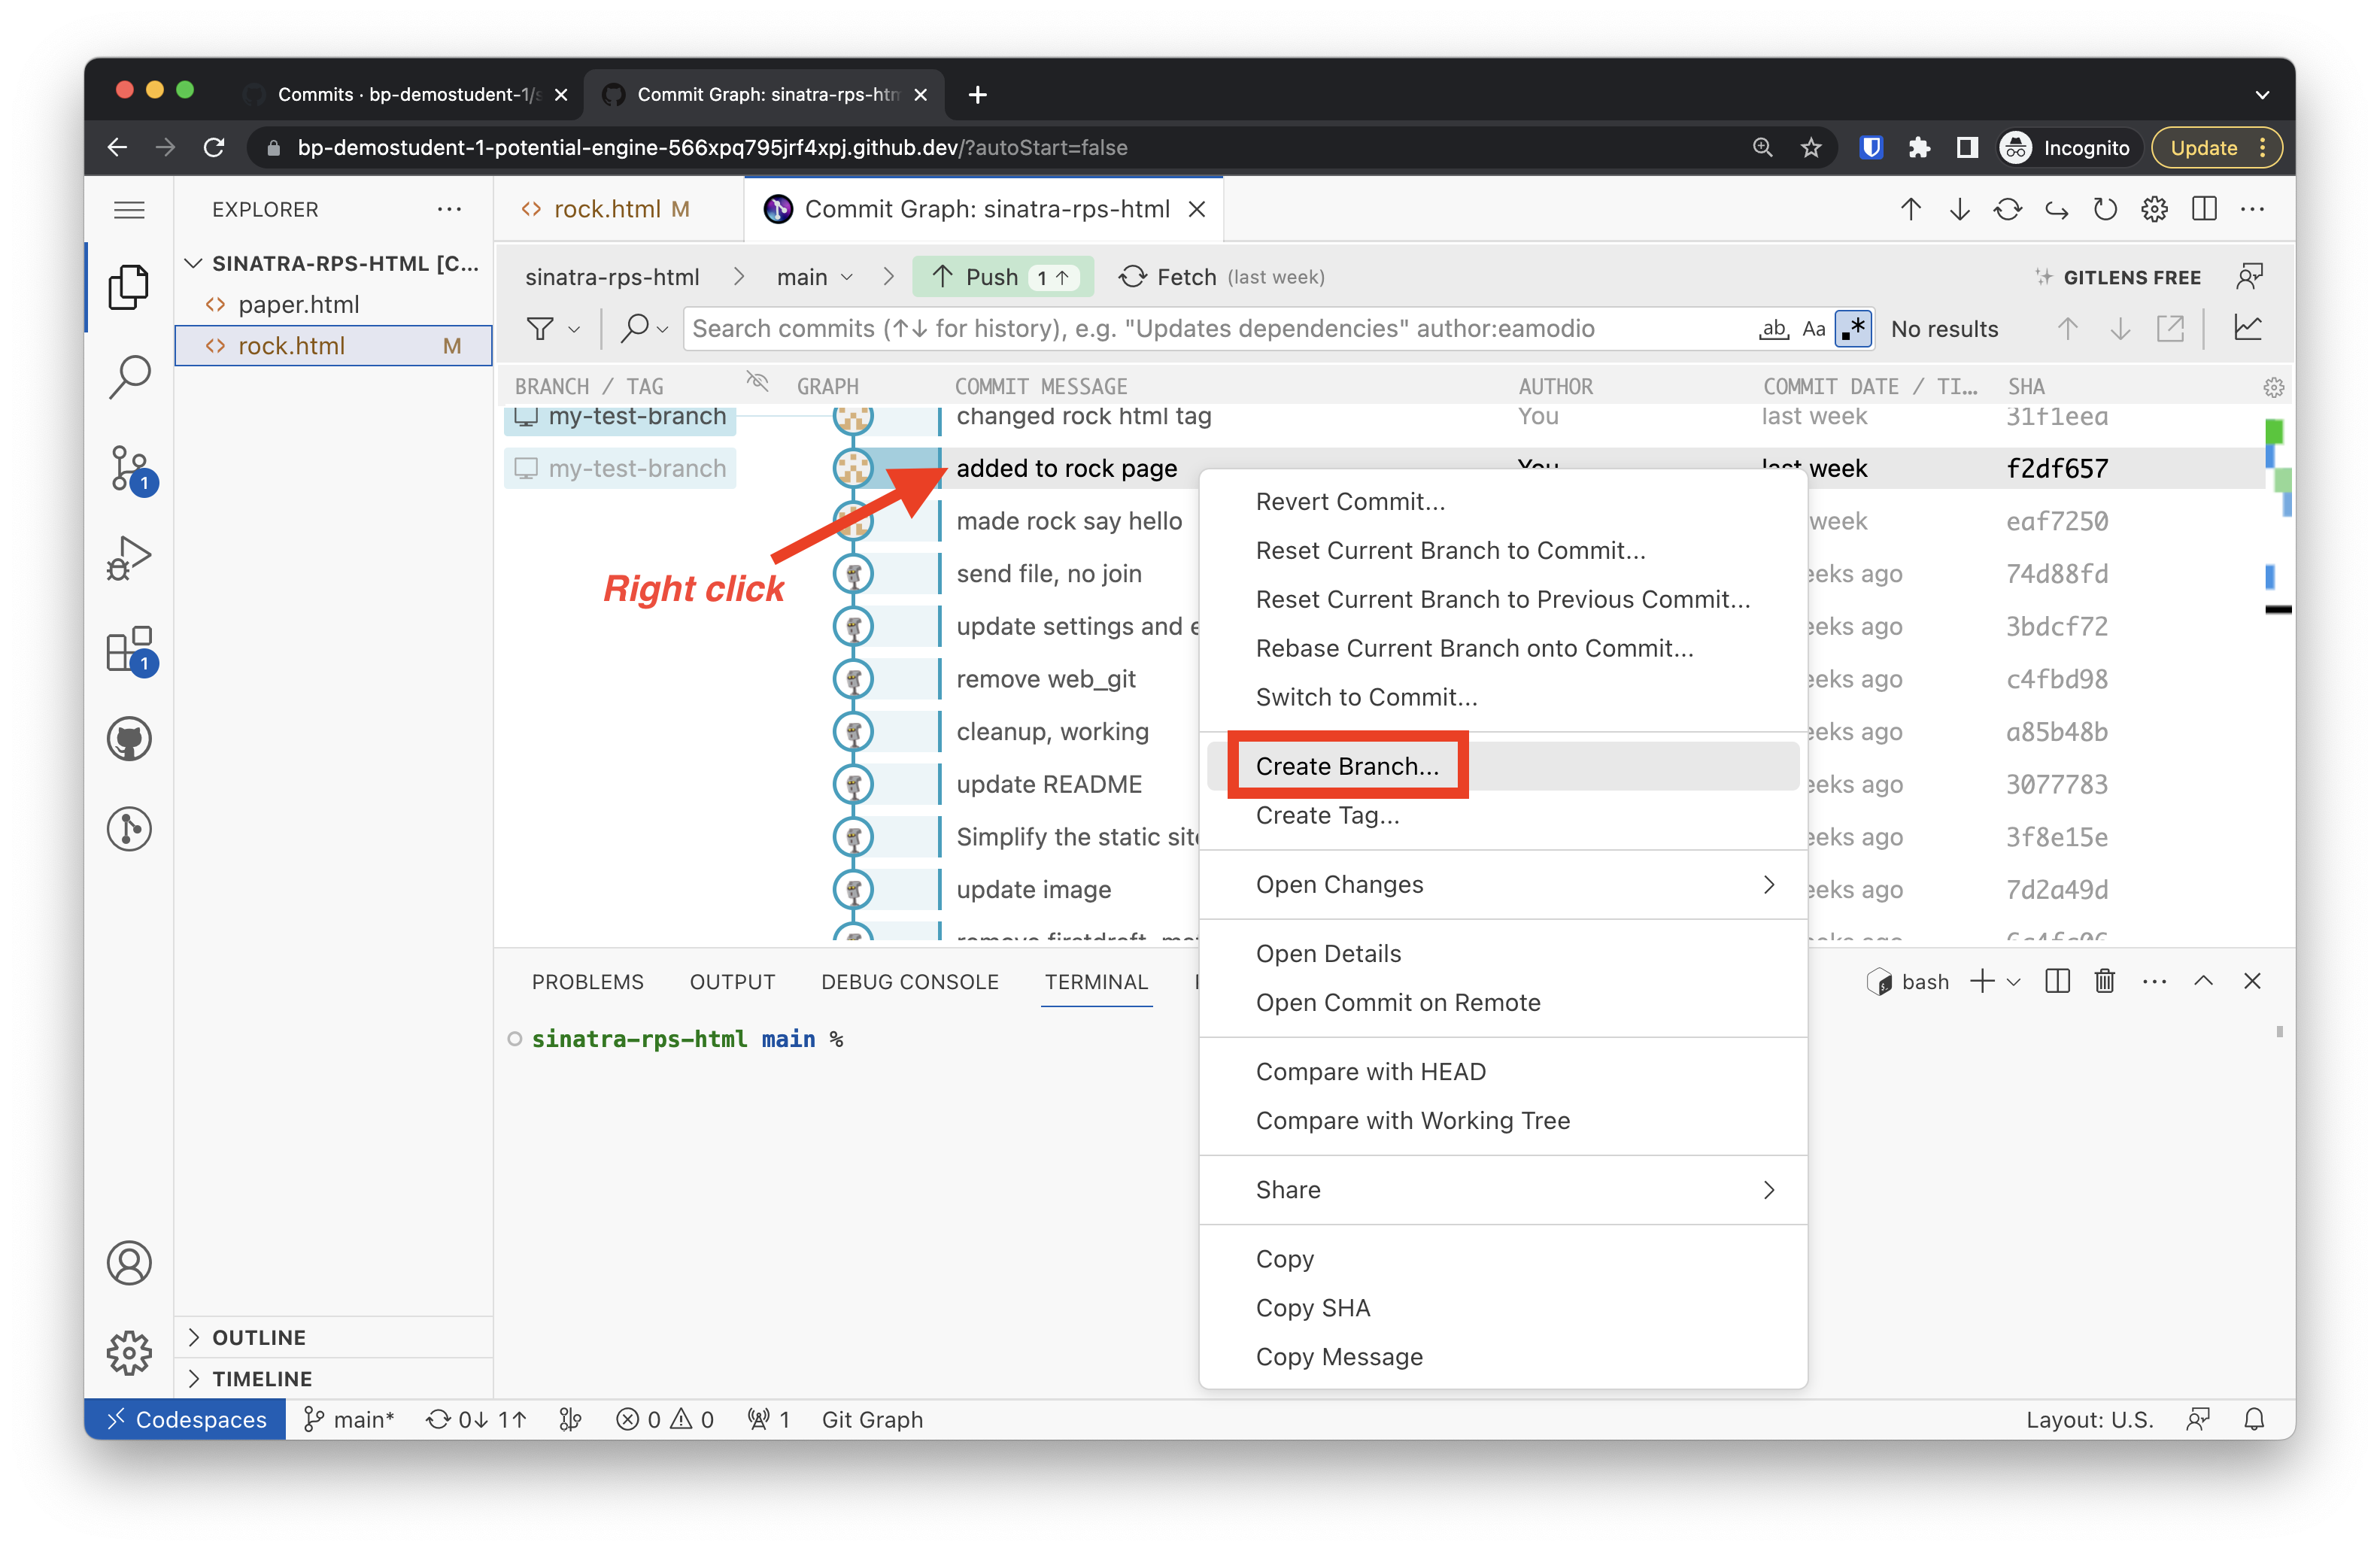
This will bring up a dialog box showing the SHA (unique identifier) of that commit:
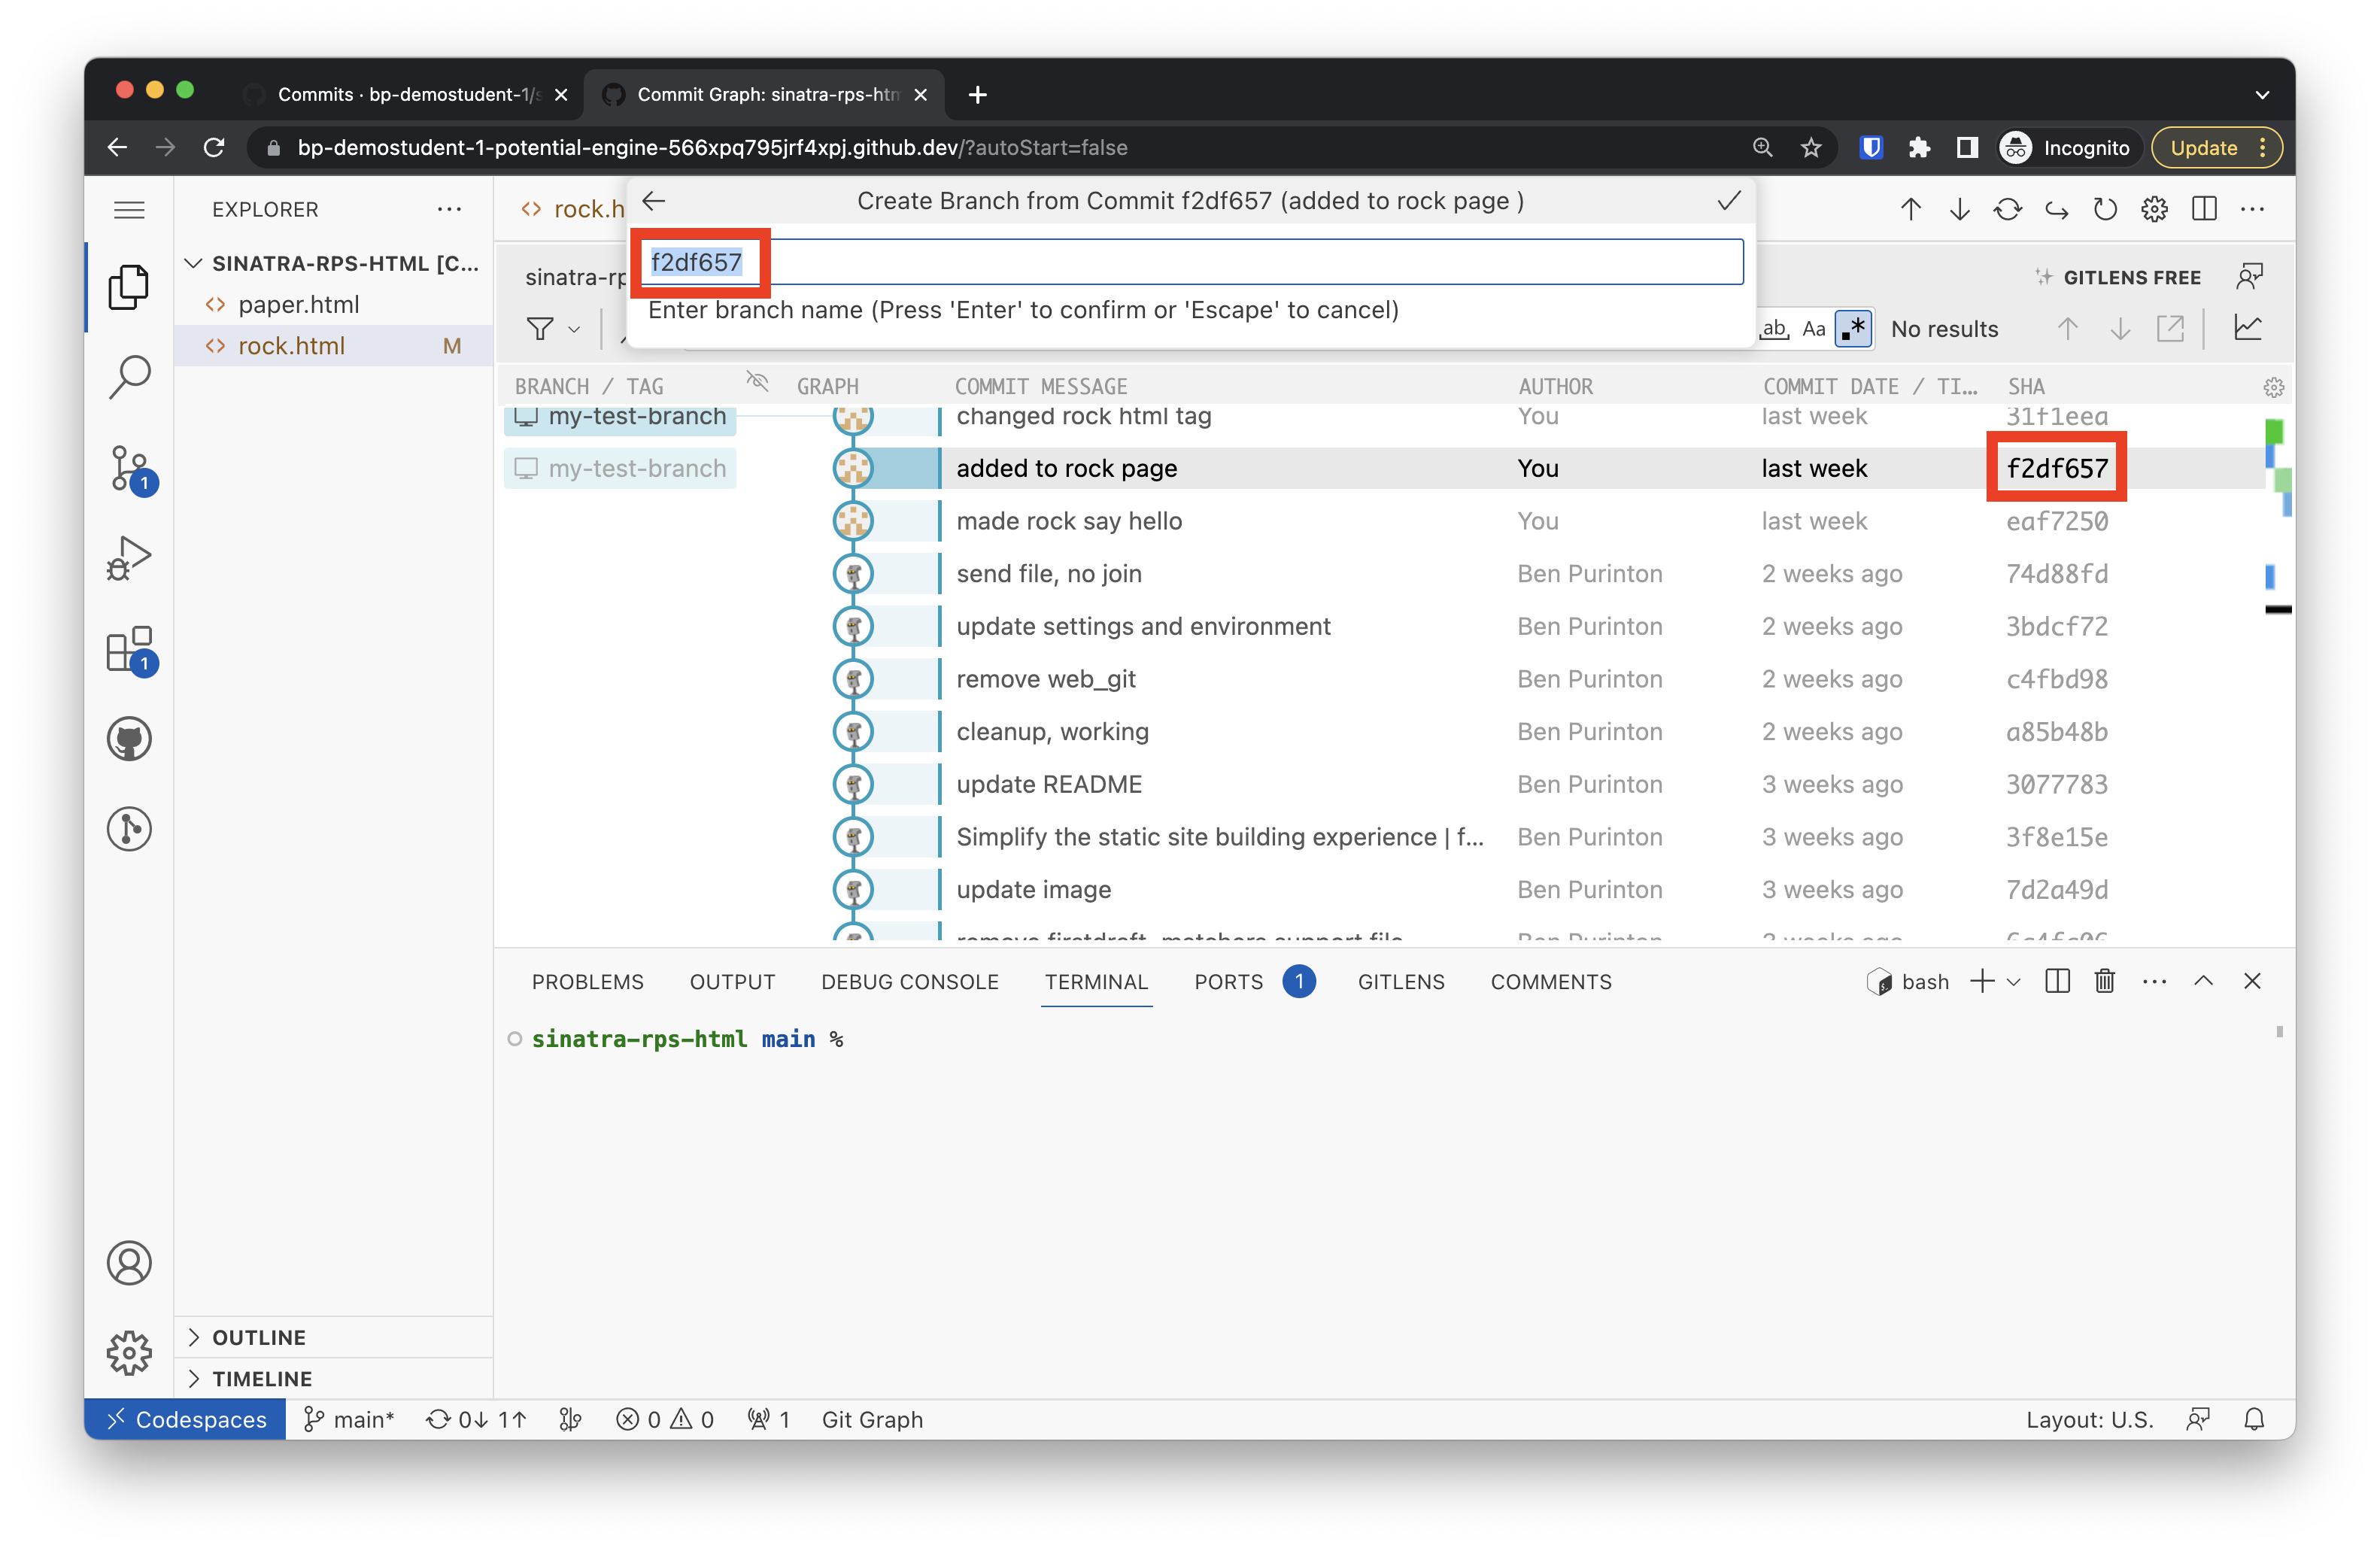
In that text field, you can type in a new name for the branch. Anything you want, just don’t put any spaces:

When you press Enter, you will be asked to just create the branch or create the branch and switch to it. You want to switch to it:

When completed, this action will snap all of the files in the project back to that point in time, and you can now make further commits along a new path — while still retaining all of your old commits on the old path.
You will note in the Git Graph that there is now a checkmark ✔ next to the new branch name, and you will also see that the branch identifier on the command-line in the terminal is also telling you that you are now working on that branch:
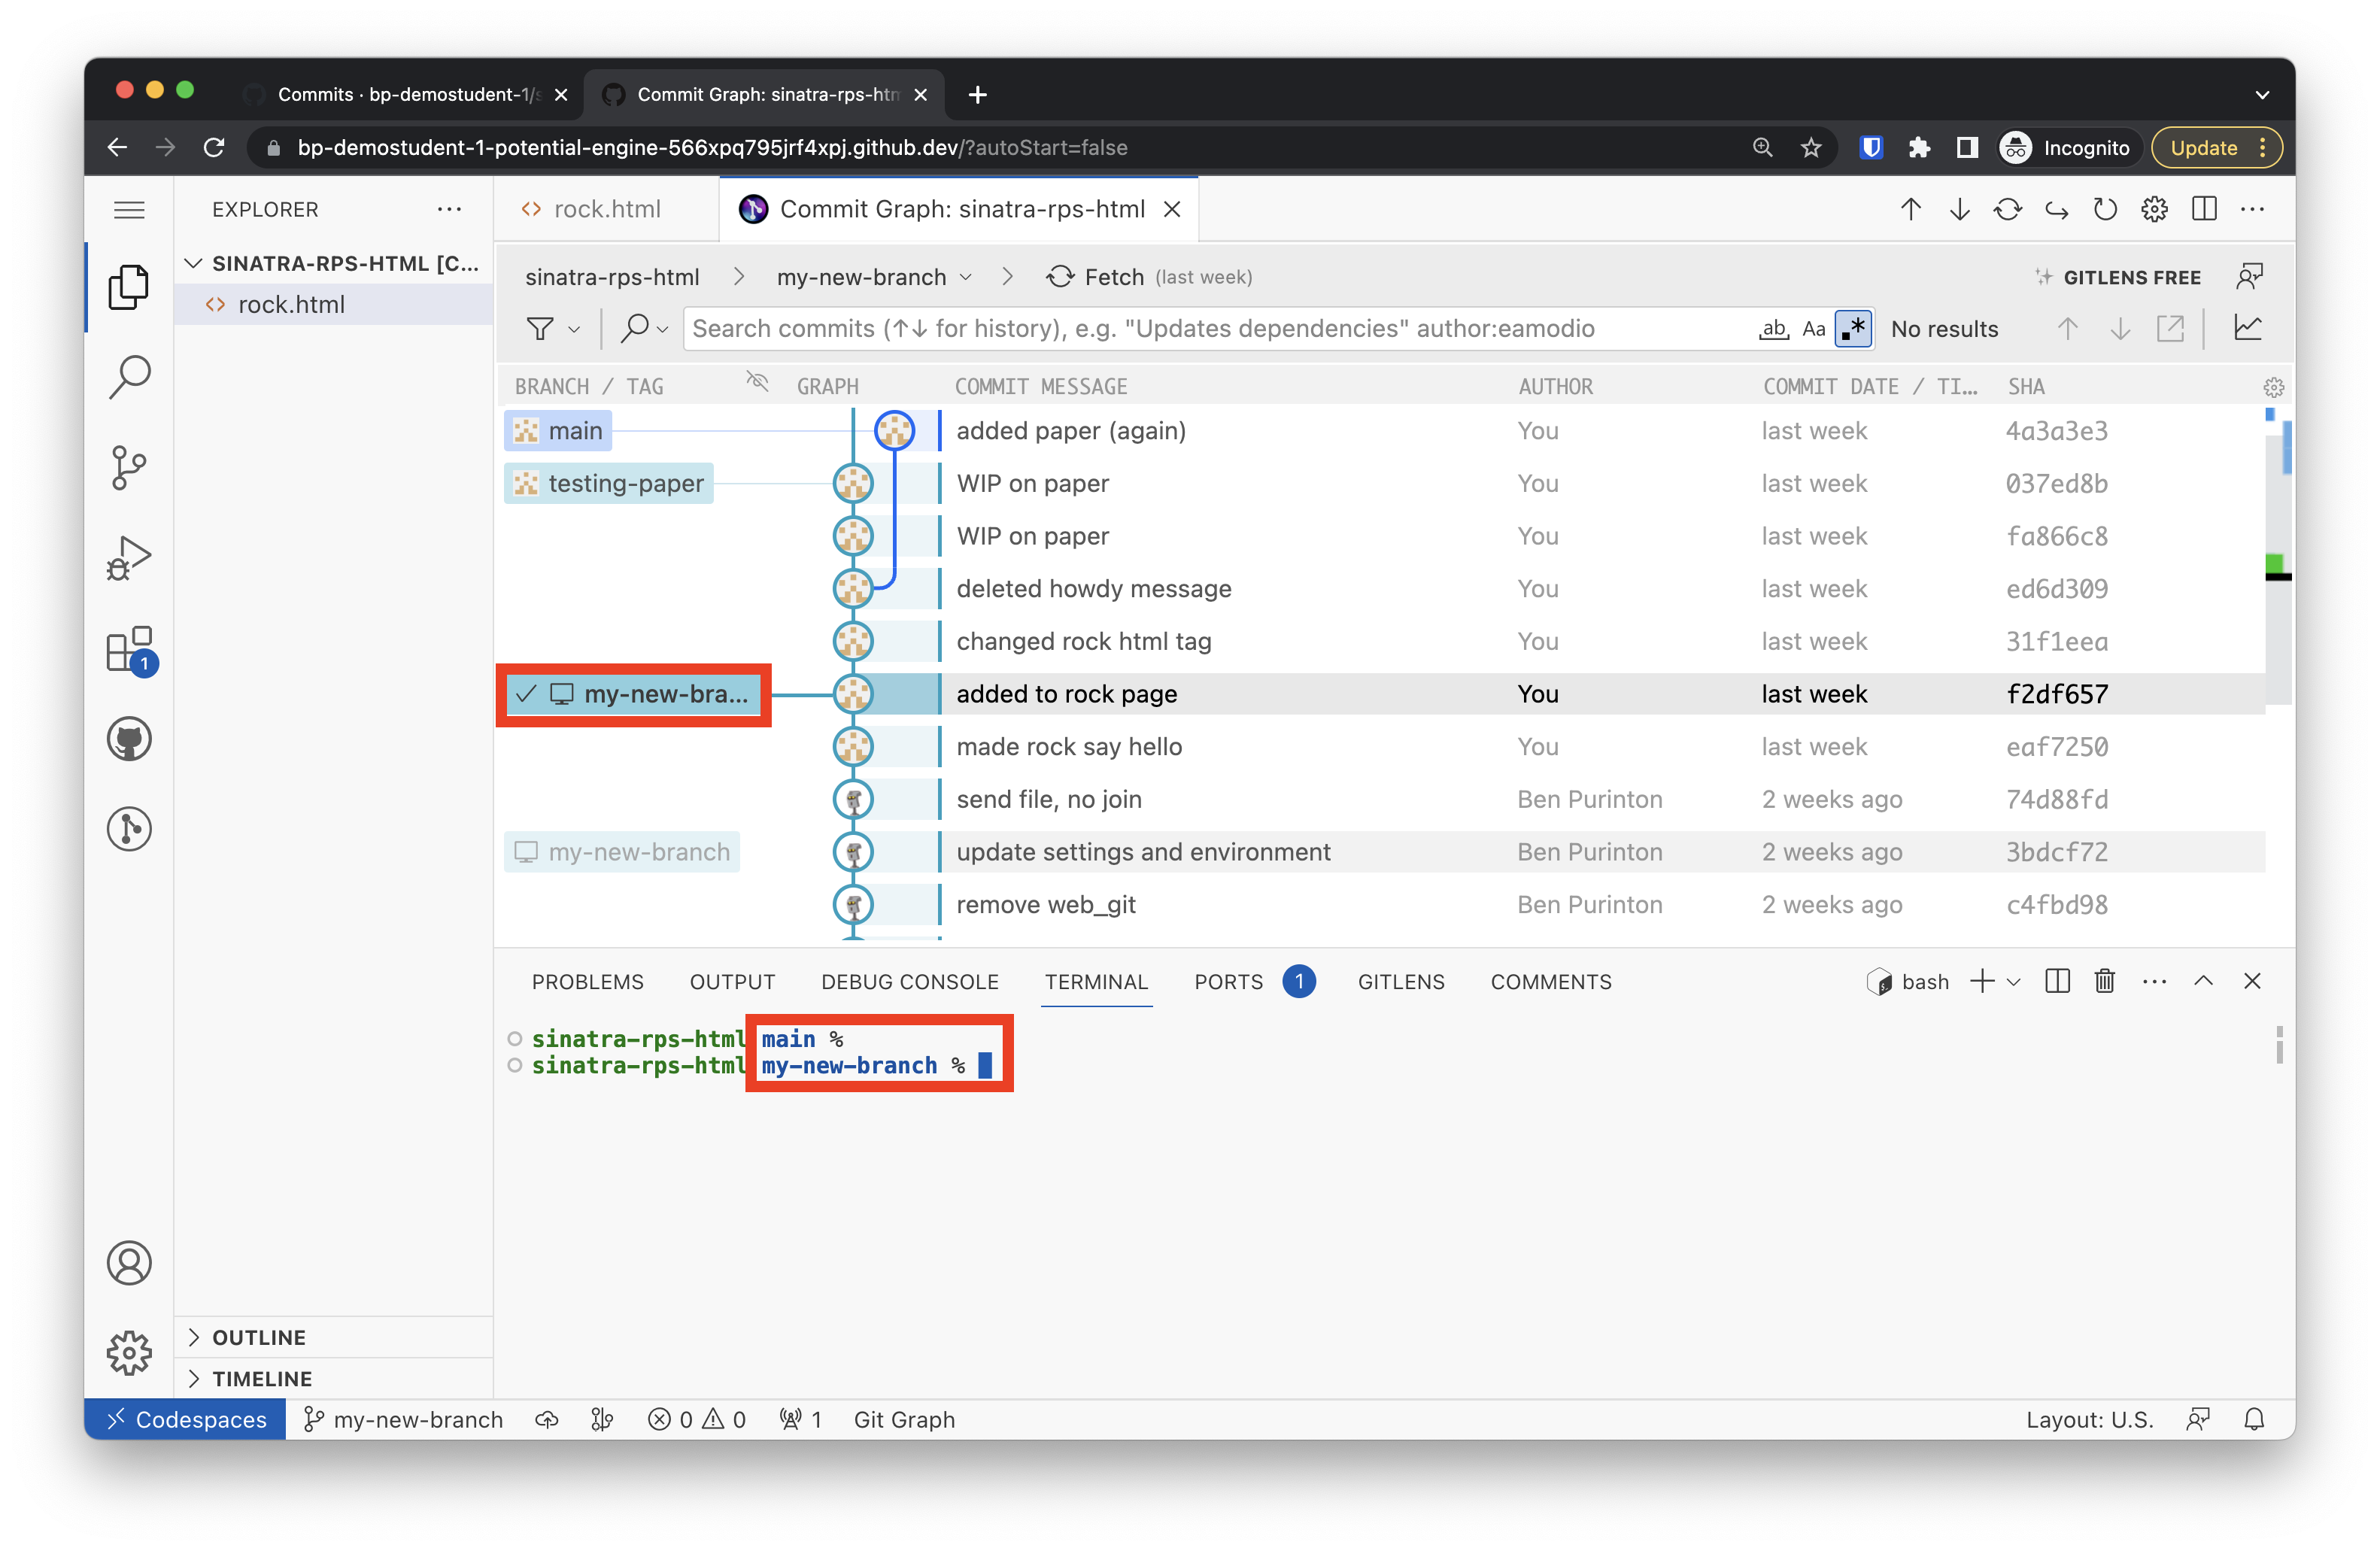
You can easily jump to any commit from any branch at any time — so feel free to experiment! Make a commit to save your current work, then jump back to a previous commit to try a different approach.
Switch to a Different Branch
Have you gone back in time and decided your first attempt was better? It’s easy to switch back to any branch shown in the left-most column of the Commit Graph, including main, which is the default starting branch.
To switch to a different existing branch, just right click and select “Switch to Branch…”:
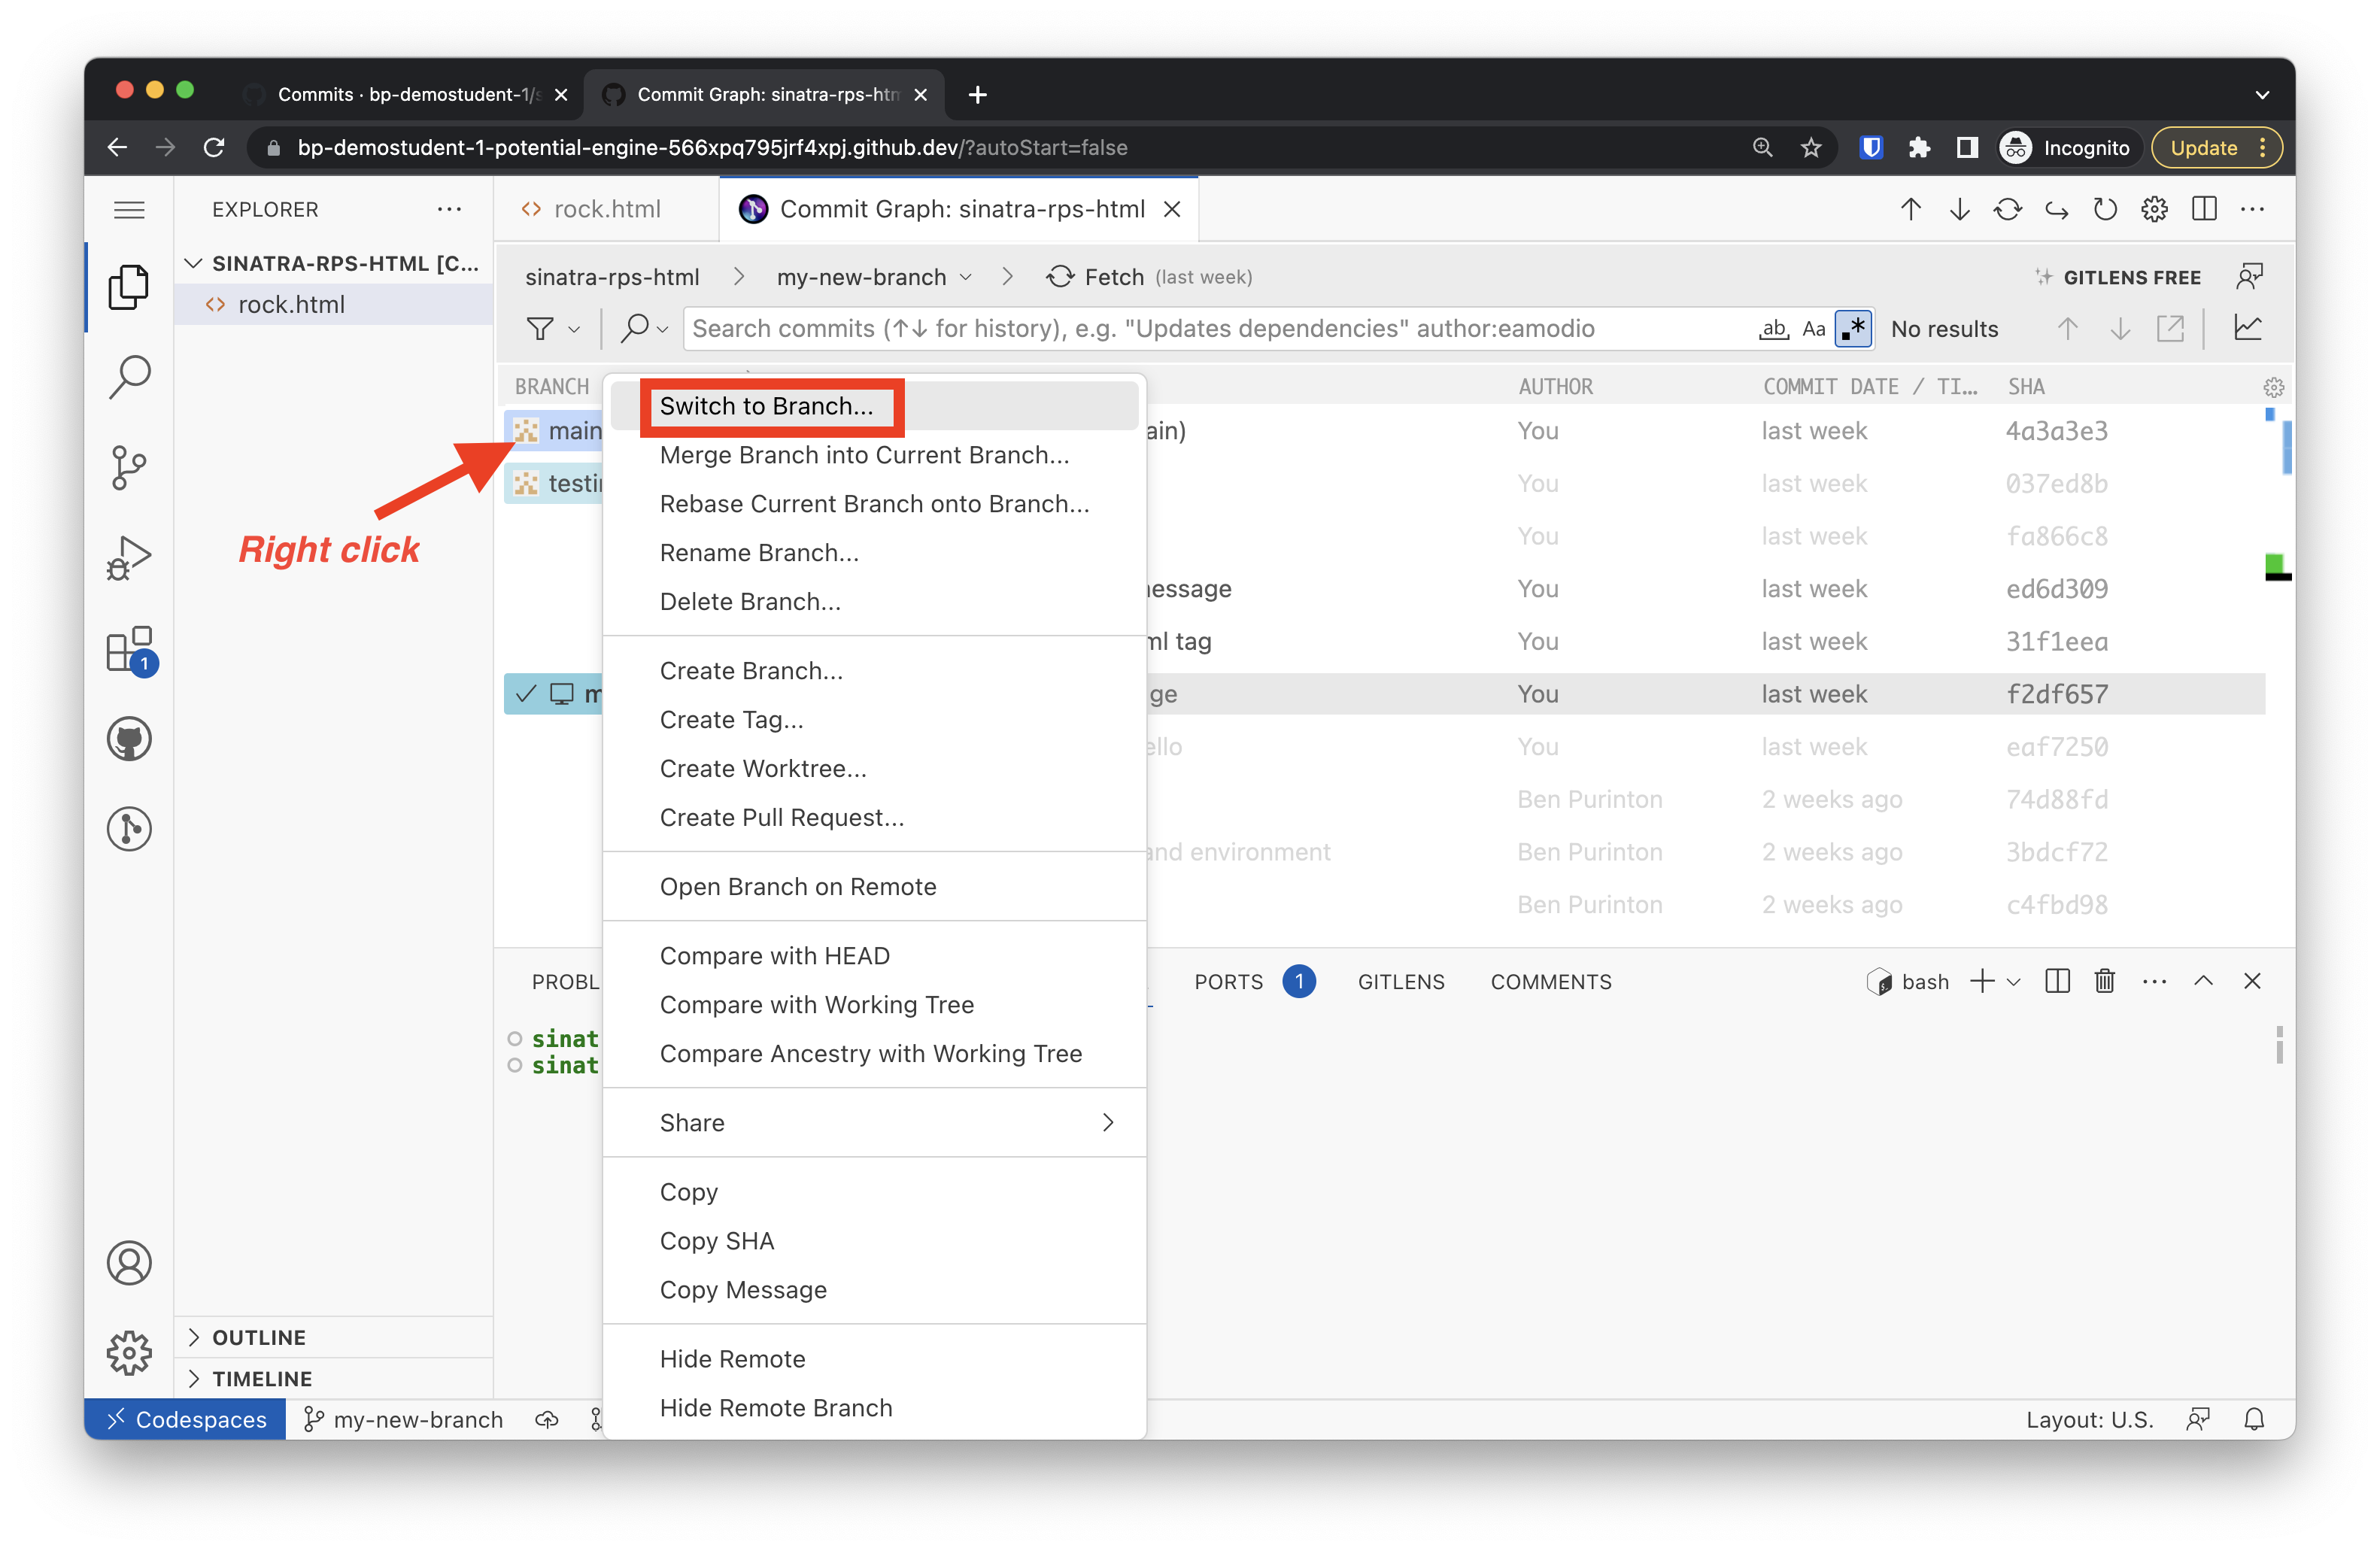
After you do this, you will see the checkmark ✔ move to the selected branch, and you will see the branch name updated on your terminal prompt.
If you’re ever unsure of what branch you’re on, look for that checkmark in the Commit Graph or just glance at your terminal prompt (you may need to press return at the command-line once to update the branch name shown).
Publish branch on GitHub
As you are working on a new branch and making commits, the first time that you push changes to GitHub with the sync button in the Source Control tab, you will see the button says “Publish Branch”:
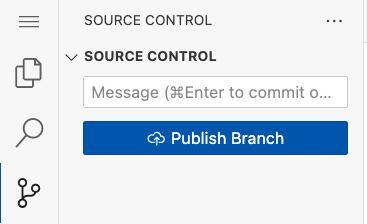
When you click the button this first time, a dialog box will appear asking where you would like to publish the branch (i.e., which GitHub repository page you want the branch to exist on). You should select your current working repository, labelled origin:

After you publish the branch the first time, you can continue to commit and sync (push) as usual, and those commits will be published to the branch on GitHub.
Viewing your branches on GitHub
When you switch between branches and make commits on them, then eventually push those commits to GitHub, you have access to all of your branches on the repository page. By default, you will be shown the code as it exists on the main branch, but there is a drop down menu with access to the code (and commits) of every other branch you make, as long as you have pushed the commits to GitHub with the Sync button:
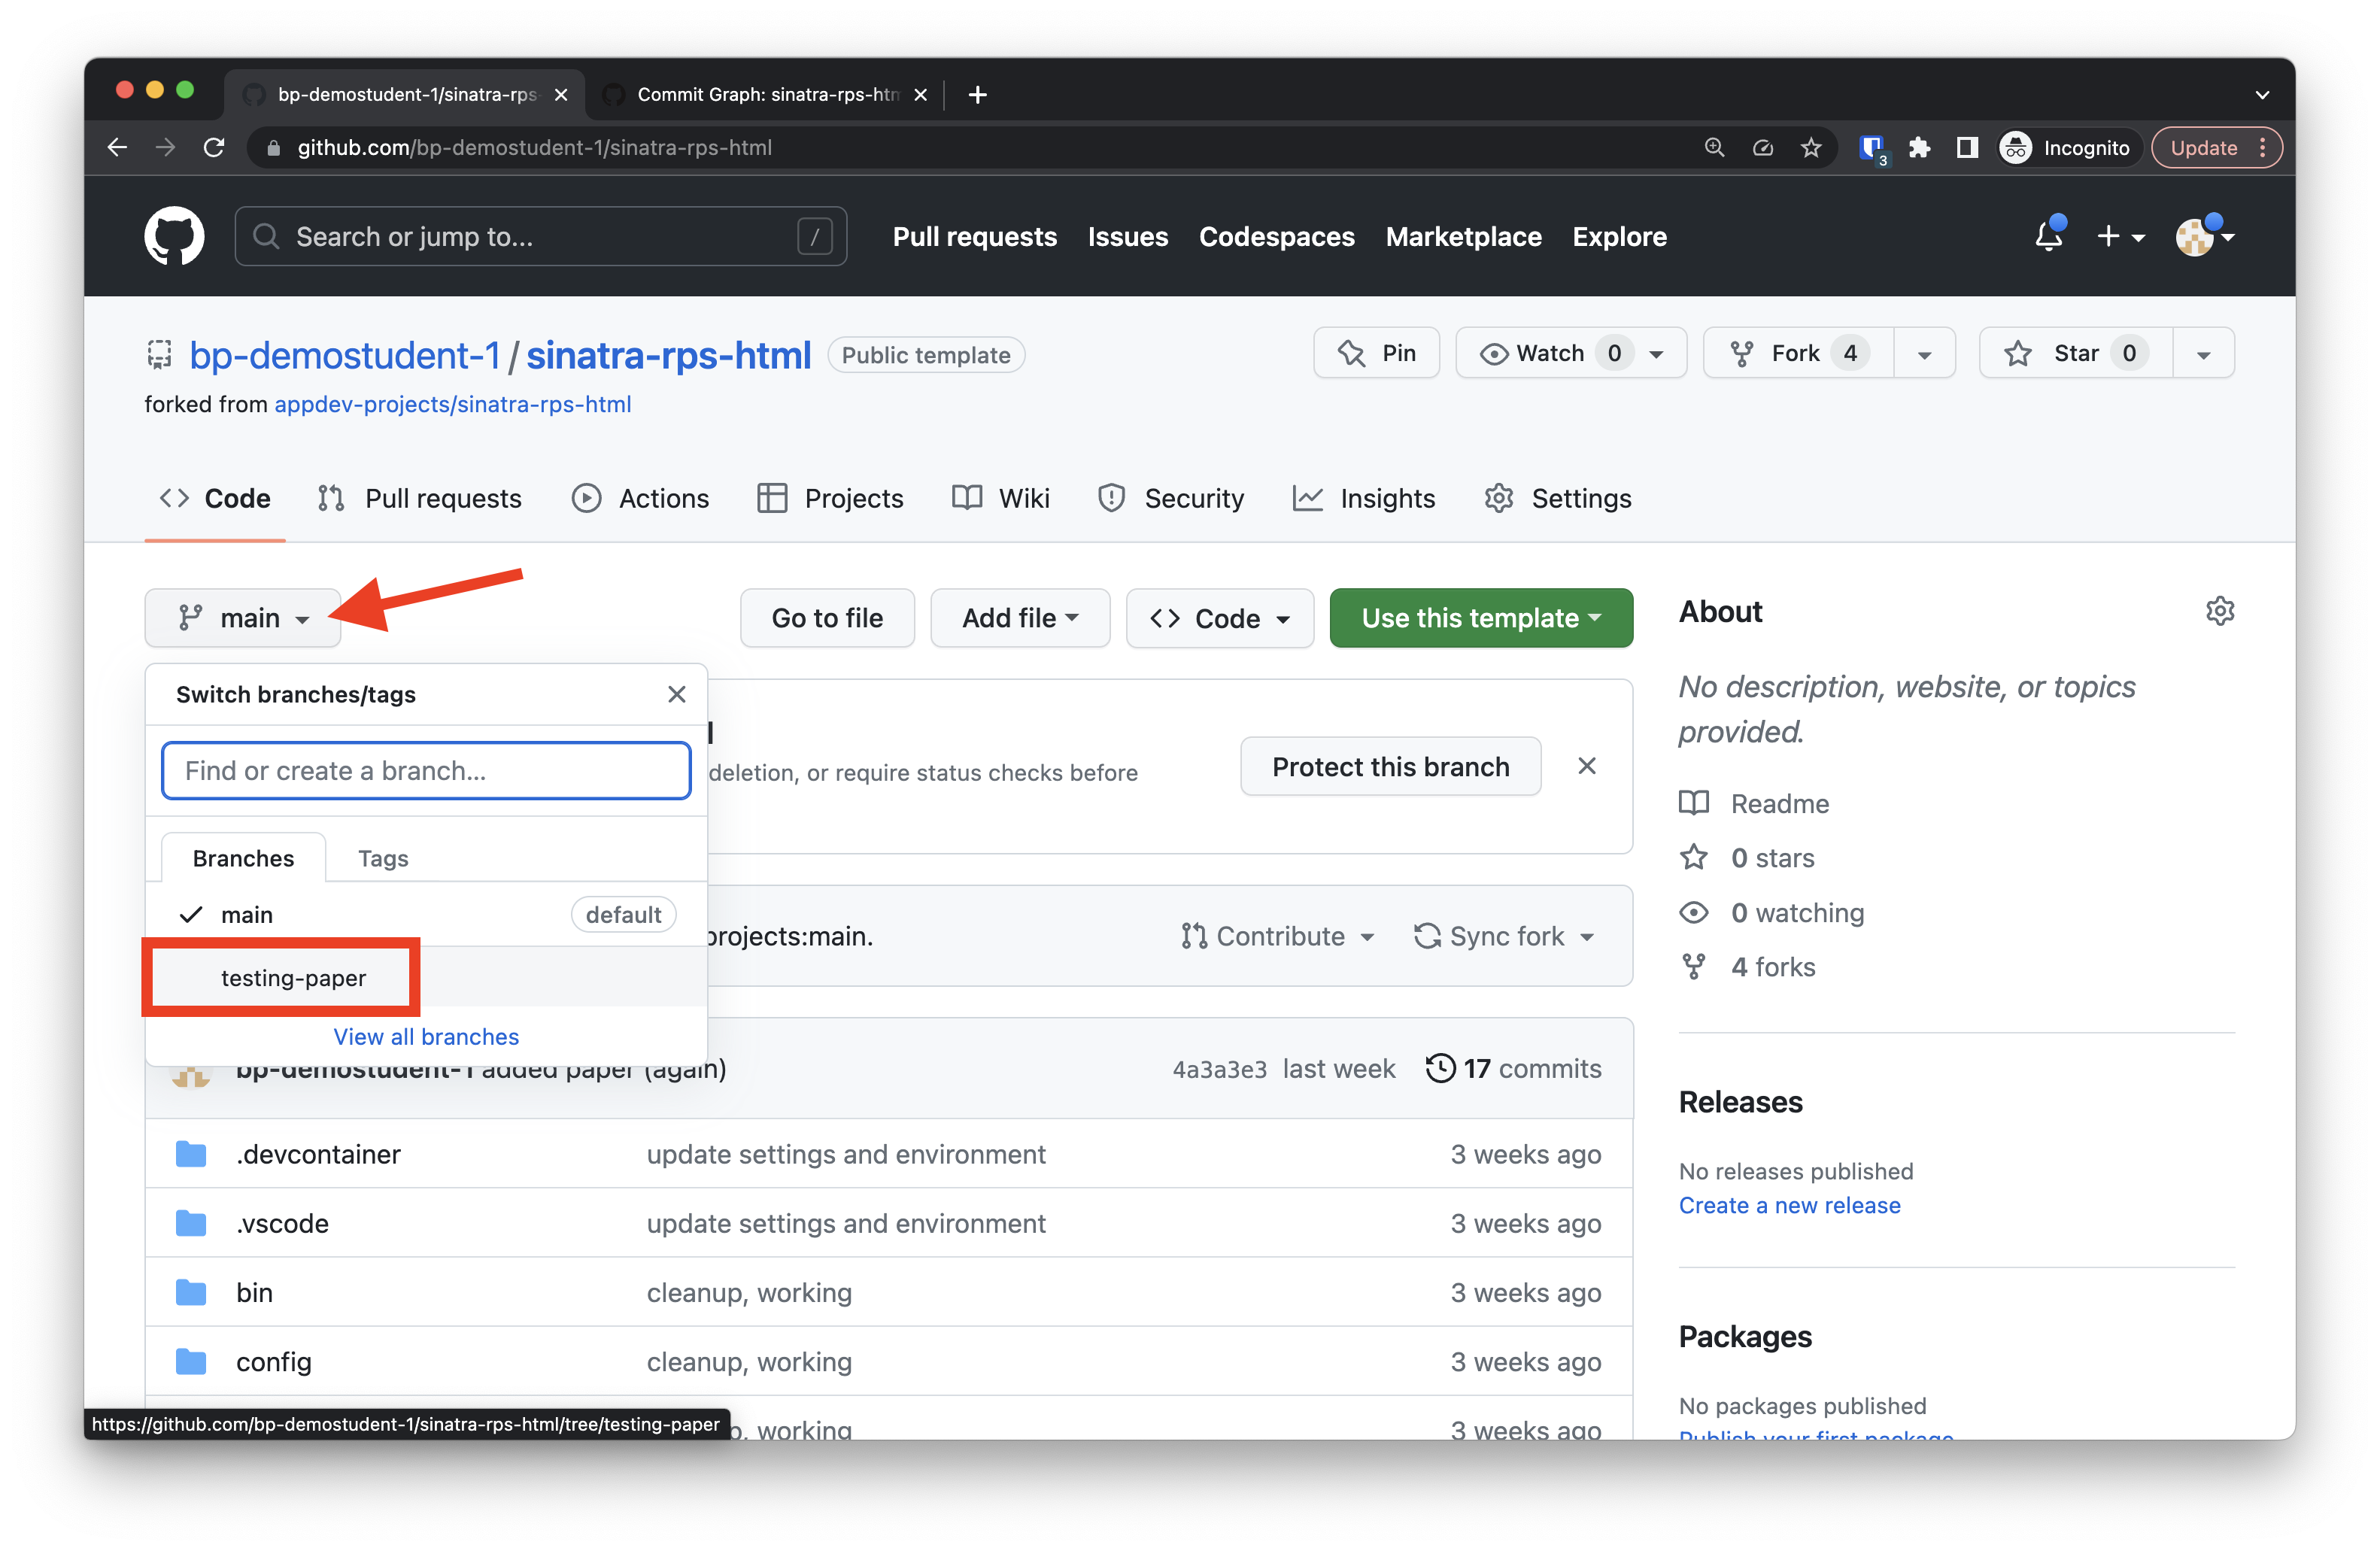
Merging branches
When you’re ready to bring the changes from one branch (usually from one of your experimental branches, e.g. your-name-first-branch) into another branch (usually into the main branch), you need to merge the branches.
Fundamentally, we use Git’s merge command, but I recommend pushing your branch to GitHub and using GitHub’s interface for merging.
Use GitHub’s interface to merge
To merge changes from e.g. your-name-first-branch into main remotely using GitHub’s web UI:
-
Push your branch to GitHub by using the “Publish Branch” button in the Source Control tab in VSCode if you haven’t already.
-
If there have been any commits on
mainsince the time you branched off it, and if any of those commits have modified the same lines of code that your commits have modified, you will have to reconcile how you want those conflicts to be handled. -
Merge the PR. You’re given a few strategies to choose from on how to do so; choose Squash and merge. This will combine all of your work-in-progress commits into just one commit; now’s your chance to craft a wonderful commit message to communicate the WHY of your changes (the WHAT is told by the diff).
Pull merged changes to your workspace
Back in VSCode, switch back to main in the Commit Graph (make sure the checkmark is on main) and:
Fetch the merged version by clicking the “Fetch” button:

Select “origin” in the dialog box:

Click the “Pull” button that appears in the Commit Graph:

Confirm the pull with the first option “Pull”:

Now you can continue working on your main branch, which will include all of the changes from your merged pull request.
Assessment Details
Review your overall progress for this lesson
| Assessment Title | Earned Points | Current Progress | Assessment Points |
|---|---|---|---|
| Totals | 0 | 0% | 0 |